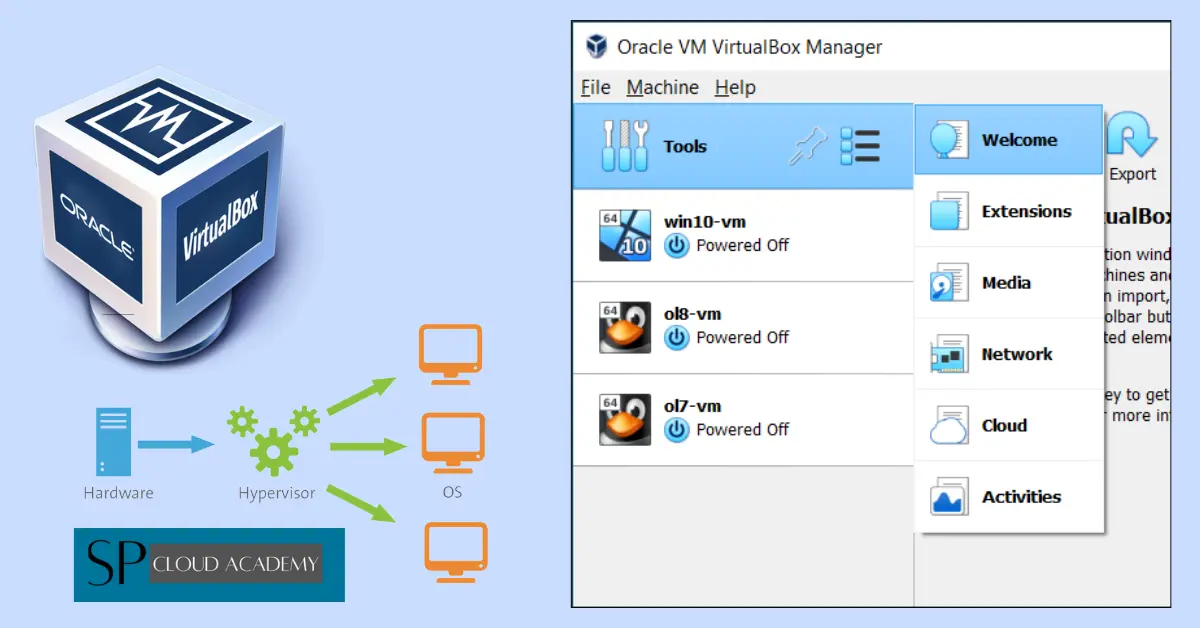
Oracle VM VirtualBox is a powerful, open-source virtualization software that enables users to create and run virtual machines (VMs) on their computers. It allows you to install and run multiple operating systems simultaneously on a single physical machine, making it ideal for testing software, running different OS environments, or experimenting with new configurations. With features like snapshotting, easy VM management, and support for a wide range of guest operating systems, VirtualBox is a valuable tool for developers, IT professionals, and anyone interested in exploring diverse computing environments without the need for additional hardware.
Oracle VM Virtualbox Installation
Here are step-by-step installation procedures for Oracle VM VirtualBox on a Windows 10 or Windows 11 computer:
Step 1: Download VirtualBox
- Open your web browser and go to the official Oracle VM VirtualBox download page at https://www.virtualbox.org/.
- Click on the “Downloads” link in the top navigation menu.
Step 2: Choose the Windows Version
- Under “VirtualBox platform packages,” select the version for “Windows hosts” (e.g., “VirtualBox X.X.X for Windows hosts”).
- Click on the download link to the right of the version you selected. This will initiate the download.
Step 3: Run the Installer
- Once the download is complete, locate the downloaded installer file (usually in your Downloads folder) with a filename like “VirtualBox-X.X.X-XXXXXX-Win.exe,” where X represents version numbers.
- Double-click on the installer file to run it.
Step 4: Installation Wizard
- The VirtualBox installation wizard will open. Click “Next” to begin the installation process.
Step 5: Choose Components
- On the “Custom Setup” screen, you can customize the installation components:
- Ensure that the “Oracle VM VirtualBox” option is selected (it should be selected by default).
- You can choose to create shortcuts on the desktop and Start menu. These options are selected by default.
- Optionally, you can choose whether or not to create associations for VirtualBox files.
- Customize these options according to your preferences, then click “Next.”
Step 6: Warning About Network Interfaces
- If you see a warning about network interfaces during the installation process, this is normal and necessary for VirtualBox to create virtual network interfaces for your virtual machines. Click “Yes” to proceed.
Step 7: Install
- Review your settings on the “Ready to Install” screen.
- When you’re ready, click the “Install” button to start the installation process.
Step 8: Driver Installation
- During installation, Windows may request permission to install device software. This is normal, and you should allow the installation to proceed by clicking “Install” or “Continue.”
Step 9: Completing the Oracle VM VirtualBox Setup Wizard
- Once the installation is complete, you will see the “Completing the Oracle VM VirtualBox Setup Wizard” screen.
- Ensure that the “Start Oracle VM VirtualBox after installation” option is checked.
- Click “Finish” to exit the setup wizard.
Step 10: Launch VirtualBox
- Oracle VM VirtualBox is now installed on your Windows 10 or Windows 11 computer. You can launch it from your Start menu or by double-clicking the desktop shortcut.
That’s it! You have successfully installed Oracle VM VirtualBox on your Windows 10 or Windows 11 system. You can now use VirtualBox to create, configure, and manage virtual machines for various purposes, such as running different operating systems or testing software.
Creating Your First Virtual Machine
Creating your first virtual machine with a Windows 10/11 OS in Oracle VM VirtualBox involves several steps. Here’s a detailed guide:
Step 1: Download Windows 10/11 ISO
- Ensure you have a Windows 10/11 ISO file ready for installation. You can obtain this from the official Microsoft website or other trusted sources.
Step 2: Open Oracle VM VirtualBox
- Launch Oracle VM VirtualBox from your Windows Start menu or desktop shortcut.
Step 3: Click “New” to Create a Virtual Machine
- In the VirtualBox Manager window, click the “New” button located in the top-left corner. This opens the “Create Virtual Machine” wizard.
Step 4: Name and Choose Windows OS Type
- In the wizard, provide information about your virtual machine:
- Name: Enter a descriptive name (e.g., “Windows 10”).
- Type: Select “Windows.”
- Version: Choose the specific Windows version you’re installing (e.g., “Windows 10 (64-bit)”).
Step 5: Allocate Memory (RAM)
- Assign an appropriate amount of memory (RAM) to your virtual machine. For Windows 10/11, it’s recommended to allocate at least 2GB, but more is preferable if your system has sufficient resources.
Step 6: Create a Virtual Hard Disk
- Create a virtual hard disk where your Windows installation will reside:
- Ensure “Create a virtual hard disk now” is selected.
- Click “Create.”
- Choose the disk file type (usually “VDI”).
- Select “Dynamically allocated” to allow the virtual disk to grow as needed.
- Specify the size of the virtual hard disk (at least 30GB is recommended).
Step 7: Configure Virtual Machine Settings
- Before completing the creation, adjust various settings:
- Select your virtual machine in the VirtualBox Manager.
- Click “Settings.”
- Under “System,” ensure that the “Enable EFI (special OSes only)” option is checked (this is important for Windows 10/11).
- Adjust other settings as needed, such as processors, display, and storage.
Step 8: Install Windows 10/11
- With your virtual machine configured, it’s time to install Windows:
- Select your virtual machine in the VirtualBox Manager.
- Click “Start.”
- VirtualBox will prompt you to select a startup disk. Choose the Windows 10/11 ISO file you downloaded.
- Click “Start.”
Step 9: Complete the Windows Installation
- Follow the on-screen instructions to install Windows:
- Select language, time, keyboard input, and other preferences.
- Enter your Windows product key (if required).
- Create or sign in with a Microsoft account.
- Customize settings and choose whether to enable or disable features like Cortana and location services.
Step 10: Install VirtualBox Guest Additions (Optional)
- After Windows is installed, consider installing VirtualBox Guest Additions for improved performance and integration. To do this:
- Inside the running virtual machine, go to “Devices” in the menu bar.
- Choose “Insert Guest Additions CD image.”
- Follow on-screen prompts to install.
Step 11: Enjoy Your Windows Virtual Machine
- Once Windows is fully installed and configured, you can use your virtual machine as you would a physical Windows computer. You can install software, browse the web, and perform any tasks within the virtual environment.
Congratulations! You’ve successfully created a virtual machine with Windows 10/11 in Oracle VM VirtualBox. You can create additional virtual machines following these steps to run different operating systems on your computer.
Configuring Virtual Machines
Configuring virtual machines (VMs) in Oracle VM VirtualBox is essential to ensure they run efficiently and meet your specific requirements. Here’s a guide on configuring virtual machines:
Step 1: Open VirtualBox and Select a VM
- Launch Oracle VM VirtualBox and select the virtual machine you want to configure from the VirtualBox Manager.
Step 2: Access VM Settings
- With the virtual machine selected, click the “Settings” button in the VirtualBox Manager toolbar. This opens the VM’s settings dialog.
Step 3: General Settings
- In the “General” section, you can configure various settings:
- Name: The name of your VM.
- Type and Version: Ensure they match the OS you have installed.
- Advanced tab: Here, you can configure options like shared clipboard and drag-and-drop between the host and guest.
Step 4: System Settings
- In the “System” section, you can configure hardware-related settings:
- Motherboard tab: Adjust the base memory (RAM), enable or disable EFI, and configure boot order.
- Processor tab: Allocate the number of CPU cores.
- Acceleration tab: Enable hardware virtualization features like Nested VT-x/AMD-V if your CPU supports it.
Step 5: Display Settings
- In the “Display” section, you can modify display settings:
- Screen tab: Adjust video memory, enable or disable 3D acceleration (for better graphics performance), and adjust monitor count.
- Remote Display tab: Enable VRDP (VirtualBox Remote Desktop Protocol) for remote access.
Step 6: Storage Settings
- In the “Storage” section, you can manage storage devices:
- Controller: SATA or IDE: Add, remove, or adjust the hard disk.
- Controller: IDE: Add, remove, or adjust CD/DVD drives.
- You can also add additional hard disks or optical drives if needed.
Step 7: Audio and Network Settings
- In the “Audio” and “Network” sections, you can configure audio and networking settings:
- Audio tab: Enable audio and choose the audio controller type.
- Network tab: Configure network adapters, including setting the network mode (e.g., NAT, Bridged, Host-Only).
Step 8: USB and Shared Folders (Optional)
- In the “USB” and “Shared Folders” sections, you can enable USB support and set up shared folders between the host and guest OS.
Step 9: Snapshots (Optional)
- If you plan to take snapshots of your VM, you can access the “Snapshots” tab to create, restore, or delete snapshots.
Step 10: Confirm Configuration
- Review the changes you’ve made in each section, ensuring they match your requirements.
Step 11: Save Settings
- Click the “OK” or “Apply” button to save the configuration changes. Your virtual machine is now configured according to your settings.
Step 12: Start or Restart VM
- Start or restart your virtual machine for the changes to take effect.
These steps cover the basic configuration of virtual machines in VirtualBox. Depending on your needs and the guest OS you’re running, you may need to adjust other settings such as USB filters, serial ports, and more. Be sure to consult VirtualBox documentation or online resources for advanced configuration options and troubleshooting.
Networking in VirtualBox
Configuring networking in Oracle VM VirtualBox is crucial for enabling communication between virtual machines (VMs) and the host system, as well as facilitating internet access and other network-related tasks. VirtualBox offers various network modes to suit different use cases. Here’s how to manage networking in VirtualBox:
Step 1: Open VM Settings
- Launch Oracle VM VirtualBox and select the virtual machine (VM) you want to configure the network for from the VirtualBox Manager.
- Click the “Settings” button in the VirtualBox Manager toolbar. This opens the VM’s settings dialog.
Step 2: Networking Modes
VirtualBox provides several network modes that you can choose based on your needs:
1. NAT (Network Address Translation):
- In this mode, your VM will share the host’s IP address for internet access.
- It’s suitable for general internet access but might limit direct communication between VMs and the host.
2. Bridged Networking:
- This mode allows your VM to appear as a separate device on your physical network, obtaining an IP address from your router or DHCP server.
- It enables direct communication between VMs and the external network.
3. Host-Only Networking:
- In this mode, VMs can communicate with each other and the host but are isolated from the external network.
- It’s useful for creating private networks for development and testing.
4. Internal Networking:
- Internal networks are isolated from both the host system and external networks.
- VMs connected to the same internal network can communicate with each other but not with the host or other networks.
5. Generic Networking:
- This advanced mode allows you to create custom network setups, such as emulating complex network topologies.
Step 3: Configure Network Adapter
- Within the VM’s settings dialog, navigate to the “Network” section. Here, you’ll see one or more network adapters depending on your VM configuration.
- To modify the network adapter settings, select the adapter and click the “Advanced” dropdown. From there, you can adjust the adapter type, MAC address, and more.
Step 4: Enabling Additional Adapters (Optional)
- If you need multiple network adapters (e.g., one for NAT and another for Host-Only networking), you can add more adapters by clicking the “+” button next to “Adapter 2,” “Adapter 3,” and so on. Configure each adapter according to your requirements.
Step 5: Confirm and Save Settings
- Review your network adapter settings to ensure they match your intended configuration.
Step 6: Save Settings
- Click the “OK” or “Apply” button to save the network adapter settings.
Step 7: Start or Restart VM
- Start or restart your virtual machine for the network configuration changes to take effect.
With the selected network mode and adapter configuration, your virtual machine should now be able to communicate as per your networking requirements. For further networking customization, such as configuring port forwarding for NAT mode or setting up DHCP servers for Host-Only networks, consult VirtualBox’s documentation or online resources specific to your use case.
Advanced Features
Oracle VM VirtualBox offers advanced features and capabilities that enhance virtualization and make it a powerful tool for various scenarios. Here are some of the advanced features and how to use them:
Snapshots: Snapshots allow you to save the state of a virtual machine at a specific point in time. This is invaluable for testing, development, and experimentation. To create a snapshot:
- Select the VM in VirtualBox Manager.
- Go to the “Machine” menu and choose “Take Snapshot.”
Clone VMs: Cloning allows you to duplicate a virtual machine, making it easy to create multiple instances of the same configuration. To clone a VM:
- Right-click on the VM in VirtualBox Manager.
- Choose “Clone.”
Virtual Machine Groups: You can organize your VMs into groups for better management and organization. To create a group:
- Right-click in the VirtualBox Manager.
- Choose “New Group.”
Remote Display (VRDP): VirtualBox supports Remote Desktop Protocol (RDP) for remote access to VMs. To enable VRDP:
- Go to the VM’s settings.
- Under “Display,” check “Enable Remote Display.”
USB Support: You can enable USB support for VMs, allowing you to connect and use USB devices within your virtual machine.
- Go to the VM’s settings.
- Under “USB,” enable “USB Controller” and add USB filters if needed.
Shared Folders: Shared folders enable file sharing between the host and guest OS. To set up shared folders:
- Go to the VM’s settings.
- Under “Shared Folders,” add a shared folder.
Guest Additions: Installing Guest Additions enhances VM performance and integration with the host. It provides features like shared clipboard, seamless mode, and better display resolution.
- In the running VM, go to the “Devices” menu.
- Choose “Insert Guest Additions CD image” and follow the installation prompts.
Command-Line Management: VirtualBox provides a powerful command-line interface (VBoxManage) for managing VMs, snapshots, and other settings. You can use it for automation and scripting.
Resource Control: You can allocate specific CPU cores and set resource limits for VMs to ensure they don’t consume all available system resources.
- Adjust CPU and memory settings in the VM’s settings under the “System” tab.
Nested Virtualization: VirtualBox allows you to run virtual machines within virtual machines (nested virtualization) if your CPU supports it. This is useful for testing hypervisors within VMs.
Port Forwarding: In NAT mode, you can set up port forwarding to allow external access to specific ports on your VM.
- Go to the VM’s settings.
- Under “Network,” choose “Advanced” and then “Port Forwarding.”
Shared Virtual Machines: VirtualBox supports the creation of shared virtual machines that multiple users can access and use concurrently. This is useful in enterprise environments.
These advanced features of Oracle VM VirtualBox provide the flexibility and functionality needed for a wide range of virtualization scenarios, from development and testing to production environments. Depending on your specific use case, you can leverage these features to optimize your virtualization setup.
Best Practices and Performance Optimization
Optimizing the performance of your virtual machines (VMs) in Oracle VM VirtualBox is essential to ensure they run smoothly and efficiently. Here are some best practices and performance optimization tips:
1. Allocate Sufficient Resources:
- Ensure that your VMs have an adequate amount of CPU, memory (RAM), and disk space allocated to them based on the requirements of the guest operating system and the applications you intend to run. Underallocation can lead to sluggish performance.
2. Enable Hardware Virtualization:
- If your CPU supports hardware virtualization (VT-x/AMD-V), enable it in your BIOS settings. Hardware virtualization improves VM performance significantly.
3. Use 64-bit Guest Operating Systems:
- Whenever possible, use 64-bit guest operating systems, as they can take full advantage of modern CPUs and memory addressing.
4. Update VirtualBox and Guest Additions:
- Keep Oracle VM VirtualBox and Guest Additions up to date. Newer versions often come with performance improvements and bug fixes.
5. Use SSD Storage:
- If you have the option, use Solid-State Drives (SSDs) for your VM storage. SSDs are significantly faster than traditional Hard Disk Drives (HDDs) and can improve overall VM performance.
6. Snapshot Management:
- Be cautious with snapshots. While they are useful for testing and development, having too many snapshots or large snapshots can impact performance. Consolidate or delete unnecessary snapshots.
7. Enable VirtualBox Guest Additions:
- Install VirtualBox Guest Additions in your VMs. This enhances integration, improves display resolution, and provides shared clipboard functionality.
8. Adjust VM Settings:
- In the VM’s settings, adjust the number of CPUs and RAM based on the workload. Avoid overallocating or underallocating resources.
9. Use Virtual Machine Groups:
- Organize your VMs into groups for easier management. This is especially helpful if you have many VMs.
10. Monitor Resource Usage:
– Use the VirtualBox Manager’s performance graphs to monitor CPU, memory, and network usage. This can help you identify resource bottlenecks and allocate resources accordingly.
11. Use Host-Only or Bridged Networking:
– When networking between VMs or with the host is essential, use Host-Only or Bridged networking modes for direct communication. NAT mode may introduce network latency.
12. Disable Unneeded Services:
– In your guest operating systems, disable or remove unnecessary services and startup programs to reduce resource usage.
13. Defragment Guest OS Disks:
– Occasionally defragment the virtual hard disks within your VMs, especially if you’re running Windows as a guest OS.
14. Avoid Running Resource-Intensive Applications Simultaneously:
– When running multiple VMs on the same host, try to avoid running resource-intensive applications simultaneously in different VMs, as this can lead to resource contention.
15. Consider Hardware Passthrough (VT-d/AMD-Vi):
– If your hardware supports it and you require direct access to physical hardware, consider using hardware passthrough for certain devices (e.g., GPU, USB).
16. Regularly Back Up VMs:
– Create backups of your VMs to protect against data loss and to restore VMs to a known-good state if necessary.
17. Consult Virtualization Best Practices:
– Consult Oracle’s VirtualBox documentation and best practices guides for additional tips and specific optimizations based on your use case.
By following these best practices and performance optimization tips, you can ensure that your virtual machines in Oracle VM VirtualBox operate efficiently and meet your performance expectations. Remember that performance tuning may vary depending on your specific workload and hardware configuration, so regular monitoring and adjustment are key.
Troubleshooting and Common Issues
Troubleshooting common issues in Oracle VM VirtualBox is essential for maintaining smooth virtualization operations. Here are some common issues and their troubleshooting steps:
1. VM Doesn’t Start:
- Solution:
- Check if the VM’s settings are correct, including CPU, RAM, and storage settings.
- Ensure that the VM is powered off before attempting to start it.
- Review the VM log (found in the VM’s settings) for error messages that can help pinpoint the issue.
2. VM Sluggish or Slow Performance:
- Solution:
- Allocate more RAM and CPU resources to the VM if available.
- Ensure hardware virtualization (VT-x/AMD-V) is enabled in your BIOS settings.
- Review the host system’s resource utilization to ensure it’s not overloaded.
- Reduce the number of running VMs on the host if necessary.
3. No Internet Access in VM:
- Solution:
- Check the network settings of the VM. Ensure that the correct network mode (e.g., NAT, Bridged, Host-Only) is selected.
- Restart the VM to apply changes.
- Disable any VPN or firewall settings that might be blocking network access.
4. Shared Folders Not Working:
- Solution:
- Verify that VirtualBox Guest Additions are installed in the VM.
- Ensure that the shared folder is correctly configured in the VM’s settings.
- Check folder permissions on the host.
5. Unable to Copy/Paste Between Host and Guest:
- Solution:
- Install or reinstall VirtualBox Guest Additions in the VM.
- Ensure that “Shared Clipboard” is set to “Bidirectional” in the VM’s settings.
6. Host-Only Networking Not Working:
- Solution:
- Verify that the correct host-only network adapter is selected in the VM’s settings.
- Ensure that the host-only network is correctly configured in VirtualBox’s global settings.
- Check if other network-related software or VPNs are conflicting with VirtualBox.
7. VM Freezes or Crashes:
- Solution:
- Ensure that your host system meets the VM’s hardware requirements.
- Update VirtualBox to the latest version, as newer versions often include bug fixes.
- Check for incompatible or outdated guest additions or drivers within the VM.
8. Issues with 3D Acceleration:
- Solution:
- Disable 3D acceleration if it causes problems.
- Ensure that VirtualBox Guest Additions are up to date.
9. NAT Port Forwarding Not Working:
- Solution:
- Double-check your port forwarding rules in the VM’s settings.
- Ensure that no other applications or firewalls are blocking the ports on the host.
10. No Audio in VM:
- Solution:
- Check the audio settings in the VM’s settings and ensure the correct audio controller is selected.
- Install or reinstall VirtualBox Guest Additions in the VM.
- Verify that the host system’s audio is working correctly.
11. VM Hangs During Snapshot Creation:
- Solution:
- Ensure that you have sufficient free disk space on your host system.
- Close any resource-intensive applications running on the host.
12. Error Messages:
- When troubleshooting, pay close attention to any error messages displayed in VirtualBox, as they often provide valuable information about the issue.
Conclusion
If you encounter issues beyond the scope of these common problems, consult the Oracle VM VirtualBox documentation and user forums for more specific solutions. Remember to keep your VirtualBox software and guest additions up to date, as updates often include fixes for known issues.
In conclusion, Oracle VM VirtualBox is a versatile and powerful virtualization platform that allows users to run multiple operating systems on a single host machine. Whether you are a developer, IT professional, or enthusiast, VirtualBox offers a wide range of features and capabilities to meet your virtualization needs.
In this guide, we’ve covered various aspects of Oracle VM VirtualBox, including its introduction, installation, creating virtual machines, configuring networking, advanced features, best practices, performance optimization, and troubleshooting common issues. By following the provided instructions and recommendations, you can effectively use VirtualBox to create, manage, and optimize virtual machines for various purposes, from testing and development to running multiple operating systems on a single host.
Virtualization plays a crucial role in modern computing, offering flexibility, scalability, and resource optimization. Oracle VM VirtualBox is a valuable tool in this regard, empowering users to explore and leverage the benefits of virtualization in a user-friendly and efficient manner.
As technology continues to evolve, staying updated with the latest VirtualBox releases and best practices will ensure you make the most of this virtualization solution. Whether you are a newcomer or an experienced user, VirtualBox remains a valuable asset in your virtualization toolkit.
Additional Resources
Here are some additional resources and references for further information on Oracle VM VirtualBox:
Official VirtualBox Documentation:
- The official VirtualBox documentation is a comprehensive resource covering installation, configuration, advanced features, and troubleshooting.
- Documentation Link: Oracle VM VirtualBox Documentation
VirtualBox Forum:
- The VirtualBox community forum is an excellent place to seek help, ask questions, and find solutions to common issues.
- Forum Link: VirtualBox Forum
VirtualBox Blog:
- The VirtualBox blog provides updates, news, and insights into VirtualBox developments.
- Blog Link: VirtualBox Blog
VirtualBox on GitHub:
- The VirtualBox source code and development repository can be found on GitHub for those interested in contributing or exploring the inner workings.
- GitHub Link: VirtualBox on GitHub
VirtualBox Extensions:
- VirtualBox Extension Packs add extra functionality to VirtualBox. You can find and download them from the official VirtualBox website.
- Oracle VM VirtualBox Extension Pack Downloads
Virtualization and Cloud Computing Learning Resources:
- If you’re interested in broader topics related to virtualization and cloud computing, there are many online courses, tutorials, and certifications available on platforms like Coursera, edX, and Udemy.
Operating System Documentation:
- Depending on the guest operating system you plan to run in VirtualBox, refer to the official documentation of that OS for specific setup and configuration instructions.
Books: There are several books available that cover VirtualBox in detail, including setup, administration, and advanced topics. Search for VirtualBox books on online retailers or libraries.
Online Tutorials and YouTube Channels:
- You can find numerous online tutorials and YouTube channels dedicated to VirtualBox. These resources often provide step-by-step guides, tips, and demonstrations.
Virtualization Communities and User Groups:
- Consider joining virtualization communities and user groups, such as those on LinkedIn or specialized forums, to connect with others who share your interests and expertise.
These additional resources should help you expand your knowledge and proficiency with Oracle VM VirtualBox and virtualization in general. Whether you’re a beginner looking to get started or an experienced user seeking advanced insights, these references will prove valuable in your virtualization journey.