In the ever-evolving landscape of Windows system administration, the demand for versatile and efficient tools has never been greater. Windows PowerShell, often hailed as the “Swiss Army knife” of Windows system management, has emerged as a commanding force in the world of command-line interfaces and scripting languages. This robust and flexible tool provides administrators with the means to streamline tasks, automate processes, and manage Windows environments with unparalleled precision.
With Windows PowerShell at your disposal, you can wield the power of the command line like never before, harnessing a rich set of cmdlets, objects, and scripts to tackle a vast array of system administration challenges. From managing user accounts and services to orchestrating complex tasks across remote systems, PowerShell empowers you to master the intricacies of your Windows ecosystem, all through a user-friendly, script-driven interface.
This comprehensive guide aims to demystify the world of Windows PowerShell, taking you on a journey from the very basics to advanced scripting and automation. Whether you’re a seasoned IT professional or a curious newcomer, the insights and knowledge you’ll gain from this article will equip you to harness the full potential of PowerShell in your day-to-day tasks. We will explore its core concepts, scripting capabilities, remote management, and advanced functionalities, all while adhering to best practices in terms of security and efficiency.
As we delve into this powerful tool, you’ll soon realize that Windows PowerShell is more than just a command-line interface; it’s a gateway to increased productivity, enhanced system control, and a key asset for any Windows administrator. So, fasten your seatbelt, as we embark on a journey to unlock the boundless potential of Windows PowerShell, revolutionizing the way you manage Windows systems and networks.
Getting Started with PowerShell
Before you dive into the world of Windows PowerShell, it’s essential to familiarize yourself with the basics. Whether you’re a beginner or have some experience with command-line interfaces, this section will guide you through the essential elements and concepts that form the foundation of PowerShell.
1.1 What Is Windows PowerShell?
Windows PowerShell, often referred to simply as PowerShell, is a command-line shell and scripting language developed by Microsoft. It was introduced in 2006 as a replacement for the traditional Windows Command Prompt (cmd.exe) and quickly gained popularity due to its powerful capabilities. Unlike the Command Prompt, which primarily works with text-based commands, PowerShell operates on the .NET Framework and treats everything as an object. This object-oriented approach makes PowerShell exceptionally versatile and extensible.
1.2 Accessing PowerShell
Depending on your Windows version, you can access PowerShell in various ways:
- PowerShell Console: You can open the PowerShell console by pressing
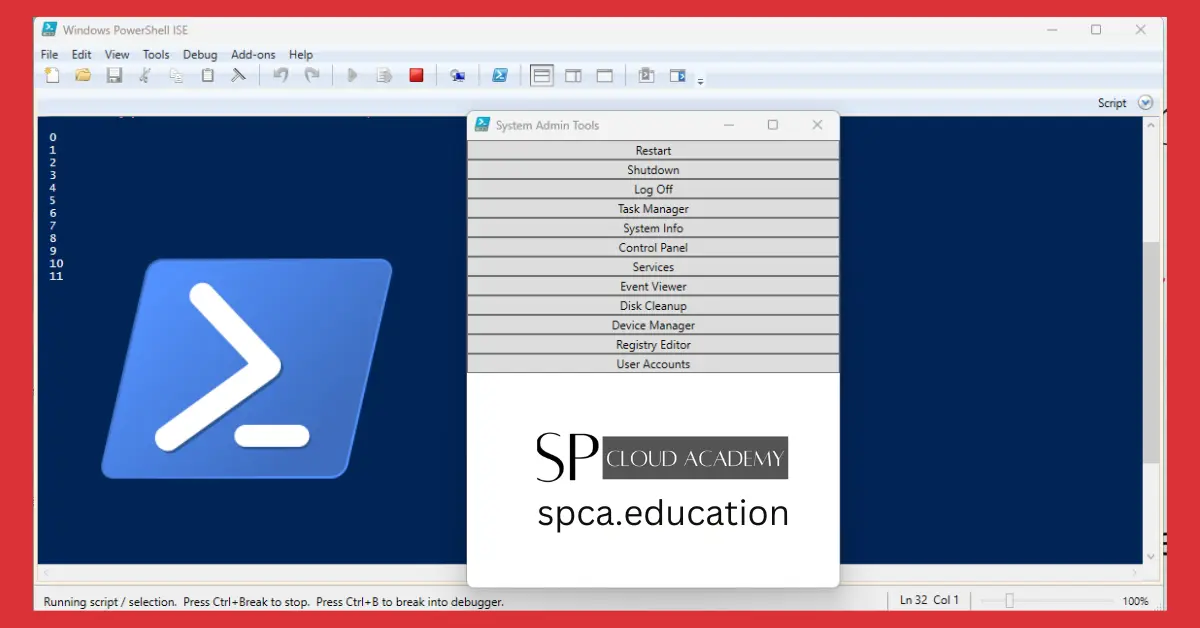
Win + Xand selecting “Windows PowerShell” or “Windows PowerShell (Admin)” for administrative tasks. - PowerShell ISE (Integrated Scripting Environment): PowerShell ISE is an integrated development environment that provides a more user-friendly interface for writing and testing scripts. You can access it by searching for “PowerShell ISE” in the Start menu.
- Windows Terminal: If you’re using Windows 10 or later, the Windows Terminal is a modern, versatile command-line tool that can run PowerShell and other shells. You can open it from the Start menu.
- Command Prompt: Although PowerShell is the preferred choice, the traditional Command Prompt is still available and may be necessary for some tasks.
1.3 The PowerShell Prompt
When you open PowerShell, you’ll be greeted by a prompt that’s ready to accept your commands. It looks something like this:
PS C:\Users\YourUserName>PSstands for “PowerShell.”C:\Users\YourUserNameis the current directory, which may vary depending on where you opened PowerShell.- The
>symbol indicates that PowerShell is ready to accept commands.
You can start typing your PowerShell commands after the prompt.
1.4 Getting Help
PowerShell has an extensive built-in help system. If you ever need assistance or information about a cmdlet or concept, you can use the Get-Help cmdlet. For example, to get help about the Get-Process cmdlet, you can type:
Get-Help Get-ProcessThis will provide you with detailed information about how the cmdlet works, its parameters, and usage examples.
Now that you’re acquainted with the basics of PowerShell, let’s move on to understanding the core concepts and commands that form the heart of this versatile tool.
Windows CLI vs. PowerShell
The Windows Command-Line Interface (CLI) and PowerShell are both command-line interfaces, but they serve different purposes and have distinct features. Here’s a comparison between the two:
Windows CLI (Command Prompt):
- Traditional Command Line: The Windows Command Prompt, often referred to as the Command Prompt or CMD, provides a traditional command-line interface. It’s been a part of the Windows operating system for a long time.
- Command-Driven: CMD is command-driven, meaning it primarily relies on simple commands and batch scripts (batch files with .bat extensions) to perform tasks.
- Limited Scripting: While you can create scripts using batch files, they are limited in terms of functionality and scripting capabilities. CMD is not well-suited for complex automation tasks.
- Basic Commands: CMD uses a set of basic commands, such as
cd(change directory),dir(list directory contents), andcopy(copy files). - Text Output: The output of commands in CMD is typically in text format, making it less suitable for structured data processing.
PowerShell:
- Advanced Shell: PowerShell is a more advanced command-line shell and scripting language developed by Microsoft. It provides a versatile and powerful environment for system administration and automation.
- Object-Oriented: PowerShell is object-oriented, which means that it processes data as objects with properties and methods. This makes it more versatile for working with structured data.
- Scripting Language: PowerShell is a full-featured scripting language, allowing you to write complex scripts and functions for a wide range of tasks, from simple file management to complex system automation.
- Rich Cmdlets: PowerShell uses cmdlets (small, single-function commands) to perform actions. It comes with a rich set of built-in cmdlets that can be used for various tasks.
- Access to .NET: PowerShell provides access to the .NET Framework, making it possible to leverage .NET libraries and classes in your scripts.
- Cross-Platform: PowerShell Core is a cross-platform version of PowerShell, which means you can use it on Windows, macOS, and Linux.
- Security Features: PowerShell includes security features like execution policies, script signing, and constrained language mode to help secure your scripts and environment.
In summary, while the Windows Command Prompt (CMD) is a basic and straightforward command-line interface, PowerShell is a more advanced and versatile tool with scripting capabilities and access to a wider range of system resources. PowerShell is the preferred choice for system administrators and power users who need to perform complex system administration and automation tasks.
The PowerShell Basics
In this section, we’ll dive into the fundamental concepts and components of Windows PowerShell. These are the building blocks that you’ll use in almost every PowerShell command and script.
2.1 Cmdlets: The Workhorses of PowerShell
Cmdlets (pronounced “command-lets”) are the powerhouse of PowerShell. These are lightweight commands that perform specific actions. Cmdlets follow a consistent naming convention – typically, a verb-noun pair – that makes it easy to understand their purpose. For example, Get-Process retrieves information about running processes, and Stop-Service halts a Windows service.
Cmdlets are designed to be reusable and often accept parameters to modify their behavior. Here’s a quick example of using the Get-Service cmdlet to list all the services on your computer:
Get-Service2.2 The Pipeline
One of PowerShell’s most powerful features is its ability to use the pipeline. The pipeline allows you to pass the output of one cmdlet as the input to another, creating a chain of operations. This feature enables you to build complex commands by stringing together simple ones.
For instance, if you want to find a specific file within a directory, you can combine the Get-ChildItem cmdlet to list files in a folder with the Where-Object cmdlet to filter the results based on specific criteria. Here’s an example:
Get-ChildItem C:\Path\To\Directory | Where-Object { $_.Name -like "*.txt" }This command first lists all the files in the specified directory and then filters the list to include only files with the .txt extension.
2.3 Objects Everywhere
PowerShell treats data as objects, not just text. Everything in PowerShell is an object, and this object-oriented approach sets it apart from traditional command-line interfaces.
When you run a cmdlet, it returns objects that you can work with programmatically. For example, when you use Get-Process, it doesn’t return a text list of processes; it returns a collection of process objects. You can then manipulate and extract information from these objects using various methods and properties.
This object-oriented nature of PowerShell makes it incredibly versatile, as you can access and modify data with precision.
2.4 Basic Syntax and Variables
To start using PowerShell effectively, you need to understand its basic syntax. PowerShell uses a verb-noun structure for cmdlets, and parameters are typically specified using the -ParameterName format.
Variables in PowerShell start with the $ symbol. For example, $myVariable is a valid variable name. Variables can store data of various types, including strings, numbers, arrays, and objects.
Here’s an example of setting a variable and echoing its value:
$myVariable = "Hello, PowerShell!"
Write-Host $myVariable
These are the foundational elements of PowerShell that will empower you to perform basic tasks and start exploring more advanced concepts and commands. Now, let’s move on to understanding PowerShell’s core concepts, which will broaden your understanding of how this powerful tool operates.
PowerShell Core Concepts
Understanding the core concepts of PowerShell is essential for mastering this versatile tool. In this section, we’ll explore some fundamental concepts that will enable you to use PowerShell effectively.
3.1 Providers and Drives
PowerShell uses a concept called providers to expose various data stores as if they were file systems. Providers make it possible to interact with data sources such as the registry, environment variables, and even the certificate store using familiar file system commands. Each provider is assigned a drive letter, similar to disk drives in traditional file systems.
For example, to navigate and manipulate the Windows Registry, you can use the Registry provider. It exposes the HKLM and HKCU hives as drives, allowing you to use commands like cd HKLM:\Software to change to the Software registry key.
3.2 Managing the Registry with PowerShell
The Windows Registry is a critical component of the Windows operating system, and you can manage it efficiently using PowerShell. You can create, modify, delete, and query registry keys and values.
Here’s an example of using PowerShell to create a new registry key:
New-Item -Path "HKLM:\Software\MyCompany"This command creates a new registry key named MyCompany under HKEY_LOCAL_MACHINE\Software.
3.3 Error Handling and Exceptions
Error handling is an important aspect of PowerShell scripting. PowerShell provides various ways to handle errors and exceptions. When a command encounters an error, it generates an exception, which can be caught and processed.
You can use Try, Catch, and Finally blocks to handle exceptions. For example:
Try {
    # Some code that might generate an error
}
Catch {
    # Handle the exception here
}
Finally {
    # This block runs whether there is an error or not
}
Understanding how to handle errors and exceptions is crucial for writing robust and reliable scripts.
In the next part of this section, we’ll delve deeper into file and folder management with PowerShell, providing you with the knowledge and tools to manipulate your system’s file system efficiently using cmdlets and providers.
Managing Files and Folders
In this section, we’ll explore how to manipulate files and folders using PowerShell. Whether you need to create, move, copy, or delete files, PowerShell provides a rich set of cmdlets and capabilities to help you efficiently manage your system’s file system.
4.1 The Get-ChildItem Cmdlet
The Get-ChildItem cmdlet, often abbreviated as gci, is your go-to command for listing files and directories in a given path. It provides a versatile way to explore the contents of a folder.
To list the files and folders in your current directory, simply type:
Get-ChildItemThis will display a list of items, including their names, attributes, and more. You can also specify a path to explore a specific directory:
Get-ChildItem C:\Path\To\Directory4.2 Copying Files and Folders
PowerShell allows you to copy files and directories with the Copy-Item cmdlet. This cmdlet is highly flexible and can handle a wide range of copy operations. For instance, to copy a file from one location to another, you can use the following command:
Copy-Item -Path C:\Source\File.txt -Destination D:\Destination\To copy a directory and its contents, use the -Recurse parameter:
Copy-Item -Path C:\Source\Directory -Destination D:\Destination\ -Recurse4.3 Moving and Renaming Files and Folders
You can use the Move-Item cmdlet to move or rename files and folders. To move a file to a new location, simply specify the source and destination paths:
Move-Item -Path C:\Source\File.txt -Destination D:\NewLocation\To rename a file or folder, use the same cmdlet with the -Destination parameter:
Move-Item -Path C:\Source\OldName.txt -Destination C:\Source\NewName.txt4.4 Deleting Files and Folders
Deleting files and folders is a common task in system administration. PowerShell provides the Remove-Item cmdlet, which you can use to delete items. Be cautious when using this command, as it permanently removes files and folders.
To delete a file:
Remove-Item -Path C:\Path\To\File.txtTo delete a directory and its contents, use the -Recurse parameter:
Remove-Item -Path C:\Path\To\Directory -RecurseThese are some of the fundamental file and folder management operations you can perform with PowerShell. With these commands at your disposal, you can efficiently manipulate your system’s file system to organize, move, copy, and delete files and directories. In the next part of this section, we’ll explore working with processes and services in PowerShell, which are essential for system administration tasks.
Working with Processes and Services
In this section, we will explore how PowerShell enables you to manage running processes and control Windows services. These capabilities are essential for system administration, as they allow you to monitor and maintain the performance and functionality of your Windows environment.
5.1 Managing Processes with PowerShell
PowerShell provides a set of cmdlets to work with processes. You can query running processes, start new ones, stop or suspend them, and much more.
- To get a list of all running processes, you can use the
Get-Processcmdlet. For example:
Get-Process- If you want to find a specific process, you can filter the results by name, ID, or other criteria. For instance, to find the process with the name “notepad,” you can use:
Get-Process | Where-Object { $_.ProcessName -eq "notepad" }- To stop a process, you can use the
Stop-Processcmdlet. Be cautious when using this command, as it forcefully terminates a running process. You need to provide the process name or ID. For example:
Stop-Process -Name "notepad"5.2 Managing Windows Services
Windows services are essential components of the operating system. You can use PowerShell to start, stop, restart, and manage services efficiently.
- To list all services on your system, use the
Get-Servicecmdlet:
Get-Service- To start a service, use the
Start-Servicecmdlet:
Start-Service -Name "ServiceName"- To stop a service, use the
Stop-Servicecmdlet:
Stop-Service -Name "ServiceName"- To restart a service, use the
Restart-Servicecmdlet:
Restart-Service -Name "ServiceName"- You can also use
Set-Serviceto configure various properties of a service.
Set-Service -Name "ServiceName" -Status "Running"PowerShell makes it easy to automate the management of services and processes, ensuring that your system runs smoothly and efficiently. In the next part of this section, we will delve into the world of user and group management with PowerShell, which is crucial for managing user accounts and permissions.
User and Group Management
User and group management is a crucial aspect of Windows system administration. PowerShell provides powerful tools and cmdlets to create, modify, and manage user accounts and groups, making it an indispensable resource for maintaining the security and access control of your system.
6.1 Creating User Accounts
With PowerShell, creating user accounts is a straightforward process. The New-LocalUser cmdlet allows you to create local user accounts on your system. For example, to create a new user named “JohnDoe,” you can use:
New-LocalUser -Name JohnDoe -Password (ConvertTo-SecureString -AsPlainText "P@ssw0rd" -Force) -FullName "John Doe" -Description "Regular User"In this command:
-Namespecifies the username.-Passwordsets the user’s password (Note: Using-AsPlainTextis just for demonstration; it’s not secure in practice).-FullNameprovides the user’s full name.-Descriptionallows you to add additional information.
6.2 Managing User Groups
You can also manage user groups with PowerShell. The New-LocalGroup, Add-LocalGroupMember, and Remove-LocalGroupMember cmdlets help you create groups and add or remove members.
For instance, to create a new group and add the user “JohnDoe” to it:
New-LocalGroup -Name "MyGroup"
Add-LocalGroupMember -Group "MyGroup" -Member "JohnDoe"
These commands create a group called “MyGroup” and add the user “JohnDoe” to it.
6.3 Active Directory Management
If you’re working in a domain environment, PowerShell can also manage Active Directory users and groups. The New-ADUser, Set-ADUser, New-ADGroup, and other Active Directory-specific cmdlets are available for these tasks.
For example, to create a new user in Active Directory:
New-ADUser -Name "JohnDoe" -UserPrincipalName "john.doe@domain.com" -GivenName "John" -Surname "Doe" -AccountPassword (ConvertTo-SecureString -AsPlainText "P@ssw0rd" -Force)These cmdlets offer fine-grained control over user and group properties and are essential for managing users and groups in a domain environment.
PowerShell’s user and group management capabilities are invaluable for maintaining the security and access control of your Windows environment. In the next part of this section, we will explore more advanced topics and features of PowerShell, including scripting and automation.
Scripting with PowerShell
PowerShell’s true power comes to the forefront when you start scripting. Scripting allows you to automate repetitive tasks, create custom solutions, and perform complex operations. In this section, we’ll explore the basics of scripting with PowerShell and how to write and run scripts effectively.
7.1 Writing PowerShell Scripts
PowerShell scripts are files with a .ps1 extension that contain a series of PowerShell commands. You can create and edit scripts using a text editor or PowerShell Integrated Scripting Environment (ISE).
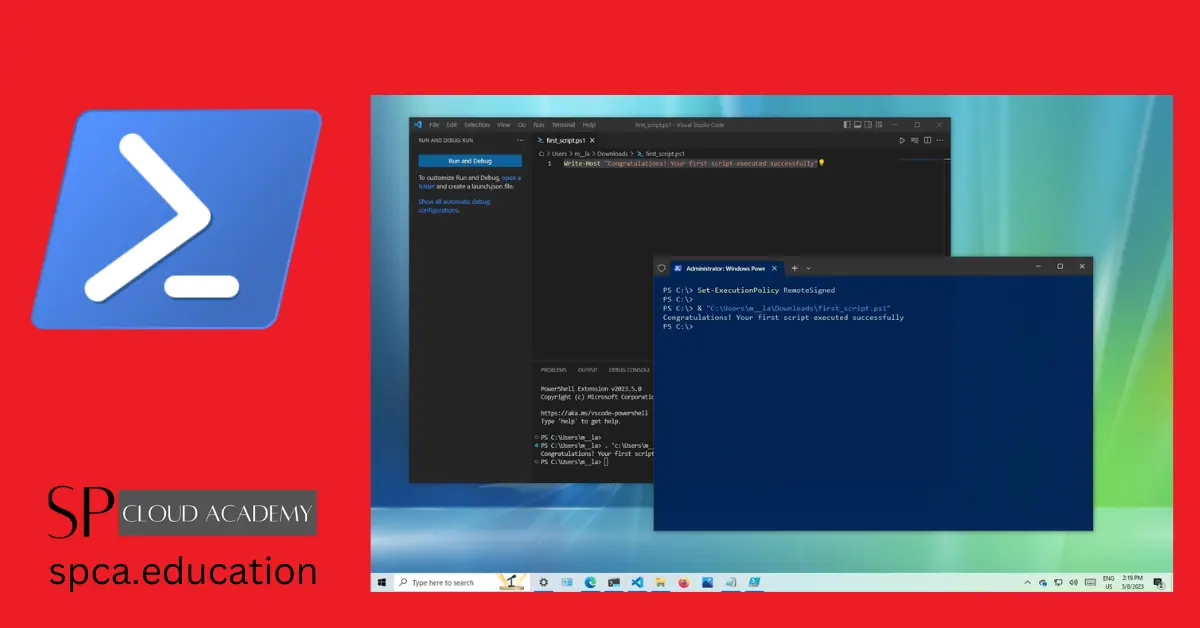
To write a simple script, open your preferred text editor and create a new file with the .ps1 extension. Here’s a basic script that greets the user:
Write-Host "Hello, World!"Save the file with a .ps1 extension, such as Hello.ps1. You can run this script from the PowerShell console like this:
.\Hello.ps1The .\ in front of the script filename specifies the current directory.
7.2 Script Parameters
Scripts can accept parameters to make them more versatile. You can define parameters using the param statement at the beginning of your script. For example, here’s a script that greets a user by name:
param (
    [string]$Name
)

Write-Host "Hello, $Name!"
You can then run the script with a specific name as follows:
.\Greet.ps1 -Name "John"7.3 Script Flow Control
PowerShell scripts can include control structures like loops and conditional statements. This allows you to create logic in your scripts.
- If statements: You can use
if,elseif, andelseto create conditional logic in your scripts. For example:
if ($condition) {
    # Code to run if $condition is true
} else {
    # Code to run if $condition is false
}- Loops: PowerShell supports
for,while, andforeachloops to repeat actions in your scripts. For example:
for ($i = 1; $i -le 5; $i++) {
    Write-Host "Iteration $i"
}
7.4 Script Best Practices
When writing PowerShell scripts, it’s essential to follow best practices to ensure readability, maintainability, and security. Some best practices include:
- Using meaningful variable and parameter names.
- Adding comments to explain the purpose of your code.
- Following a consistent coding style, such as the Verb-Noun naming convention for cmdlets.
- Testing your scripts in a safe environment before deploying them in production.
- Handling errors and exceptions gracefully.
PowerShell scripting provides you with a powerful tool for automation and customization. In the next part of this section, we’ll explore more advanced scripting concepts, such as creating and using functions, working with script modules, and incorporating conditional logic.
PowerShell Modules
PowerShell modules are a way to organize, package, and distribute scripts, functions, and other elements in a structured and reusable manner. Modules help you manage your PowerShell code more efficiently, making it easier to share and collaborate on scripts and functions. In this section, we’ll explore what PowerShell modules are and how to create and use them.
8.1 Understanding PowerShell Modules
A PowerShell module is essentially a package that contains a collection of related cmdlets, functions, variables, and other script elements. These modules are designed to be modular, which means you can load and unload them as needed, enabling a more efficient and organized script management process.
Modules offer several benefits:
- Code Reusability: Modules allow you to encapsulate and reuse code across scripts and sessions, saving you time and effort.
- Namespacing: Modules provide a namespace for your functions and cmdlets, preventing naming conflicts with other scripts or modules.
- Versioning: Modules can include version information, making it easier to manage updates and maintain compatibility.
8.2 Creating Your Own Modules
To create a custom module, you need to follow these steps:
- Create a folder for your module with the same name as your module.
- Inside the module folder, create a
.psm1file to contain your functions, cmdlets, and other script elements. This is the primary script module file. - Optionally, you can create a manifest file (
.psd1) for your module to specify metadata such as the module version and author information. This helps users understand the module’s purpose and usage.
Here’s a simplified example of creating a custom module named “MyModule”:
# Folder structure:
# MyModule/
#     MyModule.psd1 (Module manifest - optional)
#     MyModule.psm1 (Main module script)

# Inside MyModule.psm1, you can define your functions and cmdlets
Function Get-HelloWorld {
    Write-Host "Hello, World!"
}
8.3 Using PowerShell Modules
Once you’ve created your module, you can load it into your PowerShell session using the Import-Module cmdlet. For example, to load the “MyModule” module:
Import-Module MyModuleAfter loading the module, you can use the functions and cmdlets it contains in your current session.
8.4 Installing Modules from the PowerShell Gallery
In addition to creating your own modules, PowerShell provides access to the PowerShell Gallery, a repository of modules and scripts created by the community. You can install modules from the gallery using the Install-Module cmdlet:
Install-Module ModuleNameThis command downloads and installs the specified module and makes it available for use in your PowerShell sessions.
PowerShell modules are a powerful way to organize and share your scripts and functions, as well as leverage the work of others in the PowerShell community. In the next part of this section, we’ll explore remote management with PowerShell, which allows you to connect to remote systems and execute commands.
Remote Management with PowerShell
Remote management is a crucial aspect of system administration, especially in modern, distributed environments. PowerShell provides robust capabilities for connecting to remote systems, executing commands, and managing remote resources. In this section, we’ll explore how to harness the power of PowerShell for remote management.
9.1 Introduction to Remote Management
PowerShell Remoting is a feature that enables you to run PowerShell commands on remote computers. It allows you to manage remote systems without physically accessing them, making it ideal for tasks like server administration, configuration, and troubleshooting.
With PowerShell Remoting, you can establish a secure, authenticated connection to a remote machine and execute commands as if you were physically present on that system.
9.2 Enabling PowerShell Remoting
Before you can use PowerShell Remoting, you must ensure that it’s enabled on both the local and remote machines. Here’s how to enable it:
- On the Local Machine: PowerShell Remoting is usually enabled by default. You can check its status with the following command:
Get-Item WSMan:\localhost\Client\TrustedHostsTo enable remoting, you may need to add the remote computer to the list of trusted hosts:
Set-Item WSMan:\localhost\Client\TrustedHosts -Value "RemoteComputerName" -Force- On the Remote Machine: PowerShell Remoting must be enabled on the remote system. You can enable it using the
Enable-PSRemotingcmdlet:
Enable-PSRemoting -ForceThis command configures the necessary services and firewall rules to allow remote connections.
9.3 Connecting to Remote Systems
To establish a remote connection to a target system, use the Enter-PSSession cmdlet. For example, to connect to a remote computer named “RemoteComputerName,” use:
Enter-PSSession -ComputerName RemoteComputerName -Credential (Get-Credential)You’ll be prompted for credentials to connect to the remote system securely.
9.4 Running Remote Commands
Once connected to a remote system, you can run PowerShell commands as if you were working directly on that machine. For instance, to list the contents of a directory on the remote system:
Get-ChildItem C:\Path\To\Directory9.5 Exiting Remote Sessions
To exit a remote session and return to your local system, use the Exit-PSSession cmdlet:
Exit-PSSessionPowerShell Remoting is a valuable feature for managing remote systems efficiently, whether they are in the same network or located halfway around the world. In the next part of this section, we’ll explore how to automate tasks and workflows with PowerShell, making it a powerful tool for system administrators.
PowerShell and Automation
PowerShell’s ability to automate tasks and workflows is one of its most significant strengths. Whether it’s automating routine system maintenance, performing complex data processing, or orchestrating various tasks, PowerShell can be your automation workhorse. In this section, we’ll explore how to use PowerShell to streamline and automate tasks effectively.
10.1 Introduction to Automation
Automation involves the execution of tasks and processes without manual intervention. It can save time, reduce human error, and improve the efficiency and consistency of system administration. PowerShell excels in automation because of its scripting capabilities, rich set of cmdlets, and access to system resources.
10.2 Scheduled Tasks with Task Scheduler
The Windows Task Scheduler is a tool that allows you to schedule the execution of tasks at specified times or in response to specific events. You can use PowerShell to create, modify, and manage scheduled tasks with the New-ScheduledTaskTrigger and Register-ScheduledTask cmdlets.
For example, to create a scheduled task that runs a PowerShell script every day at a specific time, you can use the following:
# Define a trigger to run the task daily
$trigger = New-ScheduledTaskTrigger -Daily -At 3:00PM

# Register the task with the specified script
Register-ScheduledTask -TaskName "MyTask" -Trigger $trigger -Action (New-ScheduledTaskAction -Execute 'PowerShell' -Argument 'C:\Path\To\Script.ps1')
10.3 PowerShell Desired State Configuration (DSC)
PowerShell Desired State Configuration is a powerful framework for configuring and managing the state of your systems. DSC allows you to declare how you want your systems to be configured and ensures that they remain in that desired state, even if they drift due to changes or updates.
You define the desired state in configuration scripts, and DSC ensures that the configurations are applied consistently across your environment.
10.4 Script Automation and Execution
To automate tasks, you can create scripts that perform a series of actions without manual intervention. These scripts can be executed on-demand or scheduled to run at specific intervals.
For example, you can write a PowerShell script to back up critical files, run it on a regular schedule with Task Scheduler, and have it create backups without your direct involvement.
10.5 Automating Complex Workflows
PowerShell is capable of automating complex workflows that involve multiple steps, servers, and services. You can use PowerShell to create scripts and functions that orchestrate these workflows, ensuring they run smoothly and consistently.
For instance, you can automate the provisioning and configuration of virtual machines in a cloud environment, perform data ETL (Extract, Transform, Load) processes, or manage a multi-step deployment process.
PowerShell’s automation capabilities make it an invaluable tool for system administrators, allowing you to simplify and streamline even the most intricate tasks. In the next part of this section, we’ll explore advanced PowerShell topics, including system diagnostics and troubleshooting, and delve into advanced techniques for script optimization and management.
Advanced PowerShell Topics
PowerShell’s ability to automate tasks and workflows is one of its most significant strengths. Whether it’s automating routine system maintenance, performing complex data processing, or orchestrating various tasks, PowerShell can be your automation workhorse. In this section, we’ll explore how to use PowerShell to streamline and automate tasks effectively.
10.1 Introduction to Automation
Automation involves the execution of tasks and processes without manual intervention. It can save time, reduce human error, and improve the efficiency and consistency of system administration. PowerShell excels in automation because of its scripting capabilities, rich set of cmdlets, and access to system resources.
10.2 Scheduled Tasks with Task Scheduler
The Windows Task Scheduler is a tool that allows you to schedule the execution of tasks at specified times or in response to specific events. You can use PowerShell to create, modify, and manage scheduled tasks with the New-ScheduledTaskTrigger and Register-ScheduledTask cmdlets.
For example, to create a scheduled task that runs a PowerShell script every day at a specific time, you can use the following:
# Define a trigger to run the task daily
$trigger = New-ScheduledTaskTrigger -Daily -At 3:00PM

# Register the task with the specified script
Register-ScheduledTask -TaskName "MyTask" -Trigger $trigger -Action (New-ScheduledTaskAction -Execute 'PowerShell' -Argument 'C:\Path\To\Script.ps1')
10.3 PowerShell Desired State Configuration (DSC)
PowerShell Desired State Configuration is a powerful framework for configuring and managing the state of your systems. DSC allows you to declare how you want your systems to be configured and ensures that they remain in that desired state, even if they drift due to changes or updates.
You define the desired state in configuration scripts, and DSC ensures that the configurations are applied consistently across your environment.
10.4 Script Automation and Execution
To automate tasks, you can create scripts that perform a series of actions without manual intervention. These scripts can be executed on-demand or scheduled to run at specific intervals.
For example, you can write a PowerShell script to back up critical files, run it on a regular schedule with Task Scheduler, and have it create backups without your direct involvement.
10.5 Automating Complex Workflows
PowerShell is capable of automating complex workflows that involve multiple steps, servers, and services. You can use PowerShell to create scripts and functions that orchestrate these workflows, ensuring they run smoothly and consistently.
For instance, you can automate the provisioning and configuration of virtual machines in a cloud environment, perform data ETL (Extract, Transform, Load) processes, or manage a multi-step deployment process.
PowerShell’s automation capabilities make it an invaluable tool for system administrators, allowing you to simplify and streamline even the most intricate tasks. In the next part of this section, we’ll explore advanced PowerShell topics, including system diagnostics and troubleshooting, and delve into advanced techniques for script optimization and management.
Security and Best Practices
PowerShell is a powerful tool, but its power comes with responsibilities. Security and best practices are critical aspects of using PowerShell effectively and safely. In this section, we’ll explore essential security guidelines and best practices to ensure the responsible and secure use of PowerShell.
12.1 Execution Policy
PowerShell execution policies are security settings that determine whether and how scripts can be run in a PowerShell session. It’s crucial to configure execution policies based on your security requirements. Common execution policies include:
- Restricted: This is the default policy, which prevents running scripts. It only allows interactive use of PowerShell.
- RemoteSigned: Allows local scripts to run without a digital signature, but requires signed scripts from the internet.
- AllSigned: Requires all scripts to be signed by a trusted publisher before they can run.
- Unrestricted: Allows all scripts to run, which can be a security risk if not managed carefully.
Choose an appropriate execution policy based on your security needs and apply it using the Set-ExecutionPolicy cmdlet.
12.2 Script Signing
Signing scripts with a digital signature is a security best practice. It helps ensure the integrity and authenticity of a script. To sign a script, you need a code signing certificate. You can sign a script using the Set-AuthenticodeSignature cmdlet.
12.3 Constrained Language Mode
Constrained Language Mode is a security feature that restricts PowerShell to a limited set of language elements, reducing the risk associated with running untrusted code. You can enable it using Group Policy or by setting the registry key.
12.4 User Privileges
When running PowerShell with elevated privileges (as an administrator), exercise caution. Limit your use of administrative privileges to the tasks that require them. Regularly use standard user accounts for non-administrative tasks.
12.5 Secure Credential Handling
Avoid hardcoding credentials in your scripts. Instead, use the Get-Credential cmdlet to prompt for credentials securely or store credentials in a secure manner, such as in encrypted files using the Export-Clixml cmdlet.
12.6 Avoid Plain Text Passwords
Never store or transmit passwords in plain text. Always use secure methods such as hashed or encrypted passwords when handling credentials.
12.7 Logging and Auditing
Enable PowerShell transcript logging to record all commands executed in a session. Review logs regularly for unusual or suspicious activity. Additionally, monitor Windows Event Logs for PowerShell-related events.
12.8 Keep PowerShell Updated
Always use the latest version of PowerShell and regularly apply security patches and updates to your system.
12.9 Regularly Review and Test Scripts
Review and test your scripts before deploying them in production. Ensure they adhere to security best practices and do not introduce vulnerabilities.
12.10 Training and Awareness
Ensure that your team has the necessary training and awareness of PowerShell security best practices. Security should be a shared responsibility among all script developers and administrators.
12.11 Strong Passwords and Multi-Factor Authentication
Use strong passwords and implement multi-factor authentication to secure access to systems and services.
12.12 Antivirus and Malware Protection
Use up-to-date antivirus and anti-malware software to scan scripts and prevent malicious code execution.
PowerShell is a versatile and powerful tool, but it can pose security risks if not used responsibly. By following these security guidelines and best practices, you can harness the full potential of PowerShell while minimizing security threats and vulnerabilities.
In the final part of this section, we’ll explore the future of PowerShell and emerging trends, allowing you to stay informed and adapt to the evolving landscape of PowerShell.
Conclusion
PowerShell is a versatile and powerful tool that has become indispensable for system administrators, script developers, and IT professionals. It provides a comprehensive set of features for managing Windows systems, automating tasks, and solving complex problems. In this comprehensive guide, we’ve explored a wide range of topics related to PowerShell, from the basics to advanced techniques, best practices, and security considerations.
Throughout this guide, you’ve gained insights into:
- Getting Started: You’ve learned the fundamentals of PowerShell, including cmdlets, the pipeline, and object-oriented data handling.
- Core Concepts: We covered providers and drives, how to manage the Windows Registry, and error handling with exceptions.
- File and Folder Management: You discovered how to manipulate files and directories using cmdlets like
Get-ChildItem,Copy-Item,Move-Item, andRemove-Item. - Working with Processes and Services: You explored managing running processes and controlling Windows services with PowerShell.
- User and Group Management: We looked at creating user accounts and managing user groups, including Active Directory management in domain environments.
- Scripting with PowerShell: You gained the skills to write and run PowerShell scripts, create functions, and work with parameters and flow control structures.
- PowerShell Modules: You learned how to create, import, and use modules to organize and distribute your code efficiently.
- Remote Management: We discussed the importance of PowerShell Remoting, how to enable it, and how to connect to remote systems and run commands.
- Automation: You delved into the world of task automation, including scheduled tasks, PowerShell Desired State Configuration, and script automation.
- Advanced PowerShell Topics: We explored advanced scripting techniques, performance monitoring, security best practices, and ways to optimize your scripts.
- PowerShell Security and Best Practices: You received essential guidance on securing your PowerShell environment, script signing, execution policies, and much more.
As you continue your journey with PowerShell, remember that it is a dynamic tool that evolves over time. Staying informed about updates and best practices is essential for maximizing its potential. PowerShell has a thriving community, abundant online resources, and active forums where you can seek help, share knowledge, and keep up with emerging trends.
This guide has provided a strong foundation, but there is always more to explore and learn. Whether you’re managing a single computer or orchestrating complex tasks in a large organization, PowerShell’s flexibility and power can be your ally.
The future of PowerShell is promising, with continued enhancements and integration with modern technologies. By adapting and continuously expanding your knowledge, you can remain at the forefront of system administration and automation. Embrace the possibilities, and let PowerShell empower you in your IT journey.
FAQs
Here are some frequently asked questions (FAQs) about Windows PowerShell:
1. What is Windows PowerShell?
- Windows PowerShell is a command-line shell and scripting language developed by Microsoft for system administration and automation tasks.
2. How is PowerShell different from the Command Prompt?
- PowerShell is more versatile and powerful, offering advanced scripting capabilities, object-oriented output, and access to .NET libraries, whereas the Command Prompt is primarily a simple command-line interface.
3. What can I do with PowerShell?
- PowerShell can be used for tasks like file management, process control, system configuration, and automation of complex workflows. It’s a valuable tool for system administrators and power users.
4. How do I start using PowerShell?
- You can launch PowerShell by searching for it in the Windows Start menu. There are also PowerShell ISE (Integrated Scripting Environment) and PowerShell Core (cross-platform) versions available.
5. What are cmdlets in PowerShell?
- Cmdlets are small, single-function commands in PowerShell. They are the building blocks of PowerShell scripts and perform specific actions or retrieve data.
6. Can I write and run scripts in PowerShell?
- Yes, you can create PowerShell scripts with a .ps1 file extension and run them from the command line or scheduled tasks.
7. Is PowerShell secure?
- PowerShell provides security features such as execution policies, script signing, and constrained language mode to help secure your environment. Properly configuring these settings is essential.
8. Can I manage remote systems with PowerShell?
- Yes, PowerShell Remoting allows you to execute commands on remote computers. You can connect to remote systems and run scripts as if you were working locally.
9. Where can I find resources to learn PowerShell?
- Microsoft’s official documentation, online tutorials, books, forums, and PowerShell communities are excellent resources to start learning and improving your PowerShell skills.
10. Is PowerShell only for Windows? – While the classic Windows PowerShell is primarily for Windows systems, PowerShell Core is a cross-platform version available for Windows, macOS, and Linux.
11. What is PowerShell Desired State Configuration (DSC)? – DSC is a feature in PowerShell that allows you to declare and enforce the desired state of systems, ensuring configurations remain consistent over time.
12. How can I contribute to the PowerShell community? – You can contribute to the PowerShell community by sharing scripts, participating in forums, writing blog posts, and collaborating on open-source projects on platforms like GitHub.
Related Articles
Wikipedia Article: https://en.wikipedia.org/wiki/PowerShell