Ever found yourself in a bind with a computer that has a failing internal drive, insufficient storage, or perhaps you’re a Mac user yearning to run Windows applications without partitioning your main drive? Maybe you just want a portable Windows 11 environment you can carry in your pocket. The good news is, there’s a sleek solution: installing Windows 11 directly onto an external SSD. It’s more straightforward than you might think, and the performance can be surprisingly snappy.
This guide will walk you through why you’d want to do this, what you’ll need, and the step-by-step process to get your very own portable Windows 11 up and running. Say goodbye to internal storage limitations and hello to a new era of OS flexibility!
Why Bother? The Perks of a Portable Windows 11
Running Windows 11 from an external SSD isn’t just a neat party trick; it comes with a host of practical benefits. Firstly, portability is king. Imagine carrying your entire Windows environment – applications, files, and settings – on a device that fits in your palm. You can plug it into different compatible computers and pick up right where you left off (though driver compatibility can sometimes be a minor hurdle on vastly different hardware).
Secondly, it’s a fantastic solution for systems with limited or faulty internal storage. If your laptop’s hard drive is full or on its last legs, an external SSD provides a new lease on life without needing complex internal hardware replacements. It’s also a great way to test-drive Windows 11 without committing to an upgrade on your main system or dual-booting. For Mac users, it offers a way to access Windows-exclusive software without using Boot Camp or virtualization, which can sometimes be clunky. Finally, it can create a dedicated, isolated environment for specific tasks, like gaming or development, keeping your primary OS clean.
Gearing Up: What You’ll Need for Your External Windows 11
Before you dive into the installation, let’s gather the necessary tools and components. Having everything ready will make the process smoother.
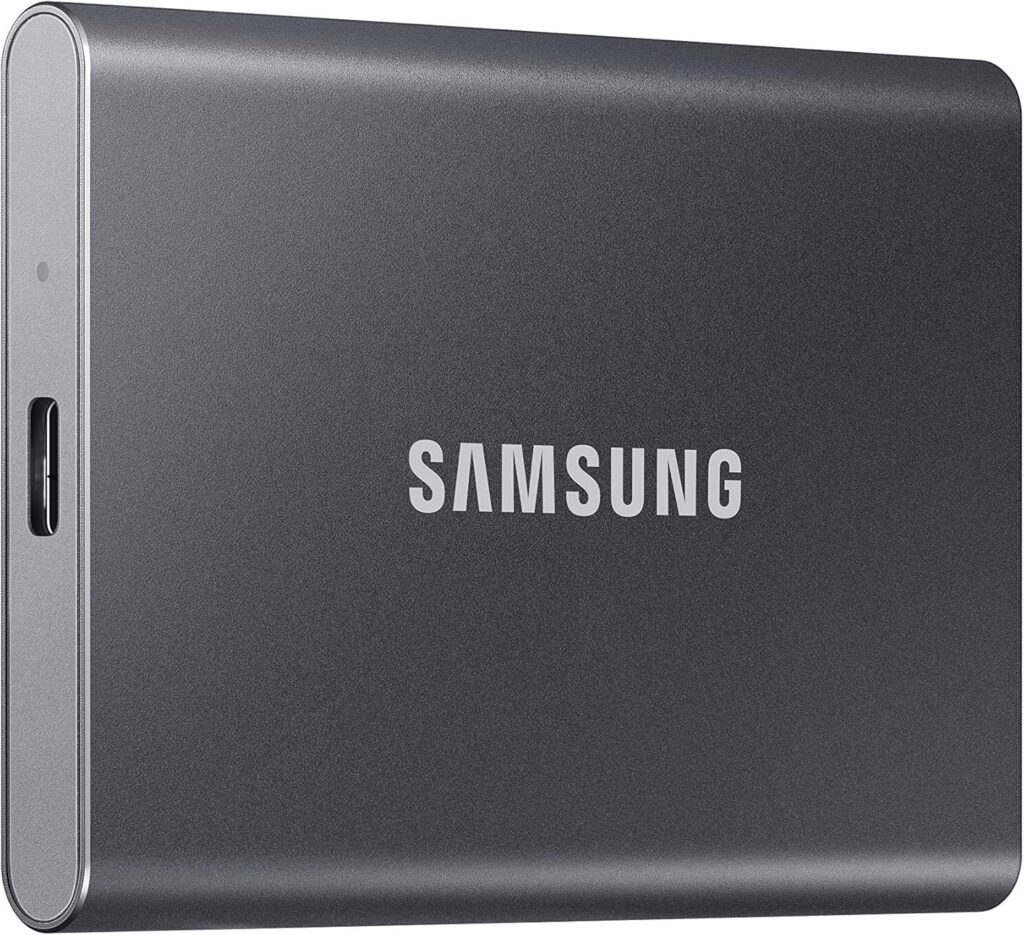
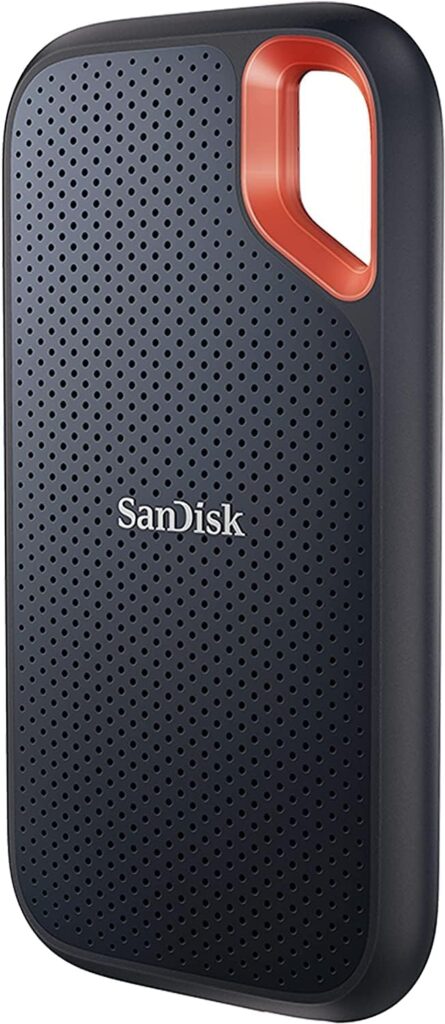
- An External SSD: This is crucial. Opt for a quality SSD with a fast interface. A USB 3.1 Gen 2 or USB 3.2 Gen 2 Type-C enclosure with an NVMe SSD inside will offer the best performance. A good quality SATA SSD in a USB 3.0 enclosure will also work, but NVMe is noticeably faster. Aim for at least 128GB, though 256GB or more is recommended for a comfortable experience with apps and updates.
- A Windows 11 ISO File: You’ll need the official Windows 11 disk image. You can download this directly from Microsoft’s website. Search for “Download Windows 11 ISO” and follow the instructions on the official Microsoft page.
- A Working Windows PC: You’ll need another computer running Windows (Windows 7, 8, 10, or 11) to prepare the external SSD.
- Rufus Utility: This free, open-source tool is our go-to for creating bootable USB drives, and it has a fantastic “Windows To Go” feature that’s perfect for this task. Download the latest version from the official Rufus website.
- Patience and Time: The process isn’t overly complex, but creating the drive and the initial Windows setup will take some time, depending on your SSD and USB port speed.
Ensure your external SSD is blank or contains data you don’t mind losing, as this process will format the drive.
The Magic Wand: Using Rufus for a “Windows To Go” Installation
Microsoft officially deprecated its “Windows To Go” feature, but thankfully, tools like Rufus have kept the spirit alive and made it accessible to everyone. Rufus simplifies the process of creating a portable Windows installation that’s designed to run from a USB-connected drive.
Here’s how to use Rufus:
- Connect Your External SSD: Plug your external SSD into a USB port on your working Windows PC.
- Launch Rufus: Open the Rufus application you downloaded. It doesn’t require installation.
- Configure Rufus Settings:
- Device: Select your external SSD from the dropdown menu. Be absolutely sure you’ve selected the correct drive!
- Boot selection: Click “SELECT” and browse to the Windows 11 ISO file you downloaded.
- Image option: This is key! From the dropdown, select “Windows To Go”. This tells Rufus to prepare a full Windows installation on the external drive, rather than just an installer.
- Partition scheme: For modern computers, GPT is usually the correct choice.
- Target system: This will typically auto-select to UEFI (non CSM), which is standard for Windows 11.
- Volume label: You can name your drive something like “Win11 External.”
- File system and Cluster size can usually be left at their defaults (NTFS).
- Start the Process: Once everything is configured, click “START.” Rufus may present you with a dialog box to customize the Windows installation (e.g., remove requirements for TPM/Secure Boot for this portable install, disable data collection). Make your selections and click “OK.”
- Warning: Rufus will warn you that all data on the selected drive (your external SSD) will be destroyed. Double-check you’ve selected the correct drive, then click “OK” to proceed.
- Wait: Rufus will now create your portable Windows 11 installation. This can take a considerable amount of time (30 minutes to over an hour) depending on the speed of your SSD, USB port, and computer. Grab a coffee!
Once Rufus completes, your external SSD is ready to boot Windows 11.
First Boot: Launching Windows 11 from Your External SSD
With your portable Windows 11 drive prepared, it’s time to boot from it. This process involves accessing your computer’s BIOS/UEFI settings to change the boot order.
- Connect the External SSD: Plug the external SSD into the computer on which you want to run Windows 11. For best performance, use the fastest USB port available (e.g., USB 3.1/3.2 Gen 2, often blue or red, or a Type-C port).
- Access BIOS/UEFI: Restart or turn on the computer. As it starts up, you’ll need to press a specific key to enter the BIOS/UEFI setup. Common keys include F2, F10, F12, Delete, or Esc. The key often briefly appears on the screen during startup. If unsure, search online for “[Your Computer Manufacturer/Model] BIOS key.”
- Change Boot Order: Inside the BIOS/UEFI, navigate to the “Boot” or “Boot Order” section. You need to set your external SSD as the primary boot device. It might be listed under “USB HDD,” “USB Storage Device,” or by its specific name.
- Save and Exit: Once you’ve changed the boot order, save the changes and exit the BIOS/UEFI. The computer will restart.
- Windows Setup: If everything is correct, your computer should now boot from the external SSD and begin the Windows 11 setup process (language selection, account setup, etc.). This initial setup will be just like installing Windows normally, but it’s happening entirely on your external drive.
After the setup, you’ll have a fully functional Windows 11 environment running from your external SSD!
Performance & Best Practices for a Smooth Experience
To ensure your portable Windows 11 runs as smoothly as possible, keep these tips in mind:
- SSD Quality Matters: As mentioned, an NVMe SSD in a fast USB 3.1 Gen 2 or Thunderbolt enclosure will offer the best performance, closely mimicking an internal drive. A good SATA SSD is workable but will be slower. Avoid using traditional USB flash drives (thumb drives) for this, as their performance and endurance are generally insufficient for running a full OS.
- USB Port Speed: Always connect your external SSD to the fastest USB port available on the host computer. A USB 3.0 port (or higher) is essential. Using a USB 2.0 port will result in a very sluggish experience.
- Install Drivers: Once Windows 11 is up and running on the external SSD, connect to the internet and let Windows Update download necessary drivers. You might also need to manually install specific drivers (chipset, graphics) from the computer manufacturer’s website, especially if you plan to use the drive on different machines.
- Avoid Abrupt Disconnection: Never unplug the external SSD while Windows 11 is running from it. Always shut down Windows properly before disconnecting the drive to prevent data corruption.
- Windows Activation: Windows 11 running via “Windows To Go” might require activation. If the host PC has a digital license for Windows 10/11, it might activate automatically. Otherwise, you may need a separate Windows 11 license for permanent use.
Navigating Potential Roadblocks (Troubleshooting)
While the process is generally smooth, you might encounter a few hiccups:
- Drive Not Booting: If the computer doesn’t boot from the external SSD, double-check your BIOS/UEFI boot order. Ensure Secure Boot is compatible or temporarily disabled if it’s causing issues (Rufus often handles this). You might also try re-creating the drive with Rufus, ensuring “Windows To Go” was selected.
- Slow Performance: This is often due to using a slow SSD or connecting to a USB 2.0 port. Verify your hardware and connections. Background Windows Update processes can also slow things down initially.
- Driver Issues on Different PCs: When moving the drive between different computers, Windows will try to adapt. However, for optimal performance, especially for graphics or specific hardware, you might need to install drivers relevant to the current host machine.
- BitLocker Encryption: If you plan to use BitLocker, be aware that it might require a TPM. Portable “Windows To Go” setups can sometimes be tricky with TPM-dependent features across different machines.
Conclusion: Your Portable Windows 11 Awaits!
Installing Windows 11 on an external SSD opens up a world of possibilities, from reviving old hardware to creating a supremely portable workspace. With tools like Rufus, the process is no longer a complex technical feat but an accessible solution for many common computing challenges. By choosing a good quality SSD and following the steps carefully, you can enjoy a surprisingly robust and flexible Windows 11 experience, unbound by the confines of an internal drive. So, grab an external SSD, download that ISO, and give your computing life a new dimension of freedom!
See Also
-
Windows To Go in Windows 11: The Portable OS Revolution You Didn’t Know You Needed!
-
Windows 11 Performance Hacks: Stop Background Apps from Wasting Your Power!
-
No Internal Storage? No Problem! Install Windows 11 on an External SSD Today
-

Unlock Hidden Performance: The Best Windows 11 Commands for Optimization
-

The Ultimate Guide to Troubleshooting Advanced System Issues in Windows 11
-
Revolutionize Your Digital Life: The Ultimate Guide to Cloud Integration in Windows 11
-
Unleashing Windows 11’s True Potential: Best Third-Party Tools You Need
-

Master Cloud Syncing and Backup with OneDrive on Windows 11
-
Mastering Patch Management: How to Keep Windows 11 Running Smoothly
-
Mastering Disk Partitioning: A Step-by-Step Guide to Disk Management in Windows 11
-

Master Windows 11 Security: A Guide to Configuring User Access Control and Admin Privileges
-

Local vs. Microsoft Accounts: Which One Secures Your Digital Life Better?