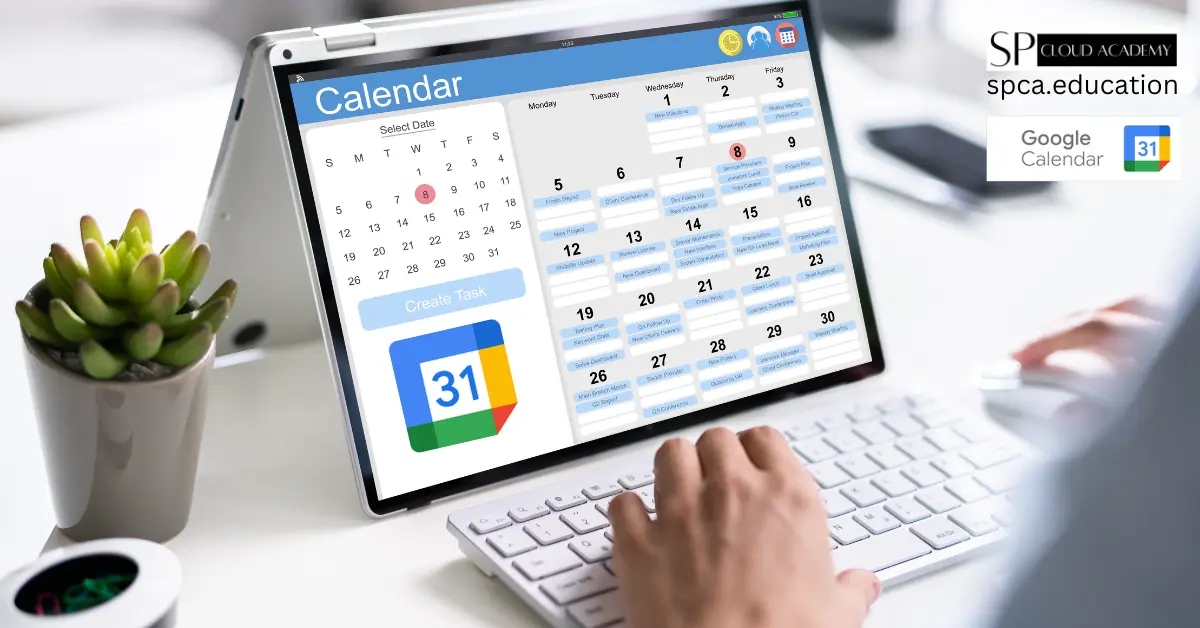
In today’s fast-paced world, effective time management is not just a skill but a necessity. With an endless stream of tasks, meetings, and personal commitments, keeping track of everything can quickly become overwhelming. This is where digital tools come into play, providing us with the ability to organize, prioritize, and manage our time more efficiently.
Among the myriad of available tools, Google Calendar stands out as a powerful ally in the quest for productivity. Whether you’re a busy professional juggling multiple projects, a student managing classes and assignments, or a parent coordinating family activities, mastering Google Calendar can significantly boost your productivity and streamline your daily routine. In this article, we will explore top features and hacks that will help you harness the full potential of Google Calendar, transforming how you manage your time and tasks.
Getting Started with Google Calendar
1.1 Creating and Setting Up Your Calendar
Step-by-Step Guide on Creating a Google Calendar Account
- Sign Up for a Google Account: If you don’t already have a Google account, visit accounts.google.com and sign up by providing the required information.
- Access Google Calendar: Once you have a Google account, go to calendar.google.com. If you’re already signed in, you will be taken directly to your calendar. If not, sign in using your Google account credentials.
- Initial Setup: On your first visit, Google Calendar will walk you through an initial setup process, which includes setting your time zone and preferred display settings.
Tips on Customizing Settings for Optimal Use
- Adjust Calendar View: Customize your default calendar view by selecting daily, weekly, monthly, or agenda view. This can be adjusted in the settings under the “View options” section.
- Color Coding: Assign different colors to various types of events or calendars (e.g., work, personal, family) to easily differentiate between them at a glance.
- Default Event Duration: Set the default duration for new events. This can help streamline event creation by reducing the need for manual adjustments.
- Time Zone Settings: Ensure your time zone is set correctly. If you frequently travel or work with international teams, enable the secondary time zone feature for added convenience.
- Notifications: Customize your notification settings to receive reminders via email or pop-up. Adjust the timing of these notifications to give yourself ample preparation time.
- Working Hours: Set your working hours in the calendar settings to prevent scheduling conflicts and to inform others of your availability.
1.2 Syncing with Other Devices
How to Sync Google Calendar with Smartphones, Tablets, and Other Devices
- Syncing with Android Devices:
- Open the “Settings” app on your Android device.
- Tap on “Accounts” or “Accounts and Backup”.
- Select “Add Account” and choose “Google”.
- Sign in with your Google account credentials.
- Ensure “Calendar” is checked to sync your calendar events.
- Syncing with iOS Devices (iPhone/iPad):
- Open the “Settings” app on your iOS device.
- Scroll down and select “Passwords & Accounts”.
- Tap “Add Account” and choose “Google”.
- Sign in with your Google account credentials.
- Make sure “Calendars” is enabled to sync events.
- Syncing with Desktop Applications:
- Windows Calendar App: Open the Calendar app, go to “Settings”, select “Manage Accounts”, and add your Google account.
- Mac Calendar App: Open “System Preferences”, select “Internet Accounts”, and add your Google account, ensuring “Calendars” is checked.
- Third-Party Calendar Apps:
- Many third-party apps (like Microsoft Outlook or Apple Calendar) support Google Calendar integration. Refer to the app’s specific instructions for adding a Google account.
Additional Tips for Seamless Syncing:
- Ensure you have a stable internet connection during the syncing process.
- Regularly check your sync settings to ensure all desired calendars are included.
- Use the Google Calendar app for the most integrated experience across devices.
By setting up your Google Calendar account and ensuring it syncs across all your devices, you can maintain a cohesive and organized schedule, no matter where you are.
Essential Features to Boost Productivity
2.1 Event Creation and Management
Quick Event Creation and Editing:
- Creating Events:
- Open Google Calendar.
- Click on the desired date and time slot or click the “Create” button.
- Fill in the event details, including title, date, time, location, and description.
- For a quicker approach, type event details directly in the date/time slot, like “Meeting with Bob at 3 PM.”
- Editing Events:
- Click on the event you want to edit.
- Select the pencil icon to open the editing window.
- Modify the event details as needed and click “Save.”
- For quick changes, drag and drop events to a new time slot or resize them to adjust the duration.
Using Color-Coding for Different Types of Events:
- Assigning Colors:
- While creating or editing an event, click on the color palette icon.
- Choose a color that represents the type of event (e.g., blue for work, green for personal).
- Creating a Color-Coding System:
- Decide on a consistent color scheme for different categories of events.
- Use colors to visually differentiate between various commitments at a glance.
2.2 Task Integration
How to Integrate Google Tasks with Your Calendar:
- Adding Google Tasks:
- In Google Calendar, click on the “Tasks” button on the right-hand side panel to open Google Tasks.
- Add tasks directly within this panel by clicking the “Add a task” button.
- Assign due dates to tasks to have them appear in your calendar.
- Viewing Tasks in Calendar:
- Ensure that “Tasks” is checked in the list of calendars on the left-hand side to display tasks alongside your events.
Benefits of Managing Tasks Within Your Calendar:
- Consolidated View:
- Having tasks and events in one place provides a comprehensive view of your schedule, making it easier to manage time effectively.
- Prioritization and Planning:
- Easily prioritize tasks based on deadlines and other scheduled commitments.
- Plan your day by allocating time slots for specific tasks, ensuring that important activities are completed.
2.3 Setting Reminders and Notifications
Customizing Reminders for Different Events and Tasks:
- Setting Event Reminders:
- When creating or editing an event, scroll down to the “Notifications” section.
- Add reminders by clicking “Add notification” and setting the desired time before the event (e.g., 10 minutes, 1 hour, 1 day).
- Setting Task Reminders:
- In Google Tasks, set due dates and times for tasks.
- Ensure notifications are enabled for tasks within the calendar settings to receive reminders.
Best Practices for Notification Settings to Avoid Overload:
- Use Different Reminder Intervals:
- Set multiple reminders for important events (e.g., one reminder a day before and another 15 minutes before).
- Prioritize Notifications:
- Only set reminders for crucial events and tasks to avoid unnecessary interruptions.
- Customize Notification Methods:
- Choose between pop-up notifications and email reminders based on your preference and the nature of the event.
- Review and Adjust Regularly:
- Periodically review your notification settings to ensure they are effective and not overwhelming.
- Adjust based on changes in your schedule or preferences.
By mastering event creation and management, integrating tasks, and customizing reminders and notifications, you can make the most of Google Calendar to stay organized and productive.
Advanced Tips and Tricks
3.1 Using Multiple Calendars
Creating and Managing Multiple Calendars for Different Aspects of Life
- Creating Multiple Calendars:
- Open Google Calendar on your computer.
- On the left-hand side, click the “+” sign next to “Other calendars” and select “Create new calendar.”
- Name your calendar (e.g., “Work”, “Personal”, “Family”) and set any other preferences.
- Click “Create calendar.” Repeat these steps for each additional calendar you need.
- Managing Multiple Calendars:
- Color Coding: Assign different colors to each calendar to easily distinguish between them.
- Viewing Options: Toggle the visibility of calendars by checking or unchecking them in the list on the left-hand side. This helps in focusing on specific calendars when needed.
- Event Creation: When creating a new event, select the appropriate calendar from the drop-down menu in the event creation window.
Sharing Calendars with Others:
- Sharing a Calendar:
- Click on the three dots next to the calendar you want to share and select “Settings and sharing.”
- Under “Share with specific people,” add the email addresses of the individuals you want to share the calendar with.
- Set permissions for each person (e.g., see only free/busy, see all event details, make changes to events).
- Click “Send” to invite them to view or manage your calendar.
- Public Calendars:
- If you want to make a calendar public, go to the “Access permissions” section in the calendar’s settings and check the box “Make available to public.”
- Set the desired visibility (e.g., see all event details or see only free/busy).
3.2 Time Zone Management
Handling Events Across Different Time Zones:
- Setting Primary Time Zone:
- Go to Google Calendar settings.
- Under “Time zone,” ensure your primary time zone is correctly set.
- Adding a Secondary Time Zone:
- In the same “Time zone” section, enable the “Display secondary time zone” option.
- Choose the secondary time zone that you frequently deal with.
- Creating Events in Different Time Zones:
- When creating an event, click on the time zone link next to the time fields.
- Select the appropriate time zone for the event start and end times.
Setting Up Your Calendar for Frequent Travelers or Remote Teams:
- Use the World Clock:
- Enable the World Clock in the calendar settings to see the current time in multiple time zones.
- Time Zone Converter Add-ons:
- Consider using add-ons that provide time zone conversion features directly within Google Calendar.
- Event Invitations:
- Clearly specify the time zone in the event title or description when inviting people from different regions to avoid confusion.
3.3 Utilizing Google Calendar Add-ons
Overview of Useful Add-ons and Extensions:
- Zoom:
- Schedule, join, and manage Zoom meetings directly from Google Calendar events.
- Trello:
- Integrate Trello boards with your calendar to see due dates and updates on tasks.
- Asana:
- Sync Asana tasks and deadlines with Google Calendar.
- Slack:
- Get reminders and notifications about calendar events directly in Slack.
How to Install and Use Popular Add-ons:
- Installing Add-ons:
- Open Google Calendar on your computer.
- Click the “+” sign next to “Add a coworker’s calendar” on the left sidebar.
- Select “Browse calendars of interest” and then click on “Browse” next to “Add-ons.”
- Search for the desired add-on (e.g., Zoom, Trello) and click the install button.
- Follow the prompts to authorize and configure the add-on.
- Using Add-ons:
- Zoom: When creating an event, click the Zoom icon to set up a meeting link directly in the event details.
- Trello: Link your Trello account, and then you can create events based on Trello card due dates.
- Asana: Sync specific projects or tasks to view them in your Google Calendar.
- Slack: Configure event notifications to be sent to specific Slack channels or users.
By effectively using multiple calendars, managing time zones, and utilizing add-ons, you can optimize your Google Calendar to handle a wide range of tasks and schedules, enhancing your overall productivity.
Collaborative Features
4.1 Scheduling Meetings with Ease
Using the “Find a Time” Feature to Coordinate with Multiple People:
- Accessing the Feature:
- Create a new event or open an existing event in Google Calendar.
- Click on the “More options” button.
- Navigate to the “Find a time” tab next to “Event details.”
- Using “Find a Time”:
- Add the email addresses of invitees in the “Guests” section.
- Google Calendar will display the availability of all guests if their calendars are shared.
- Adjust the event time by clicking on a time slot where all (or most) guests are available.
- For large groups, use the “Suggested times” feature to quickly find suitable slots.
- Once a suitable time is found, click “Save” and send the invites.
Setting Up and Managing Recurring Meetings:
- Creating Recurring Events:
- When creating or editing an event, click on the “Does not repeat” dropdown menu.
- Choose the frequency of recurrence (e.g., daily, weekly, monthly, annually).
- For more specific recurrence, select “Custom” to define your own pattern (e.g., every Monday and Wednesday).
- Managing Recurring Events:
- To edit a single occurrence, click on the event and select “This event” when prompted.
- To edit the entire series, select “This and following events” or “All events” and make the necessary changes.
- For cancellations, you can delete a single event or the entire series by choosing the appropriate option.
4.2 Sharing and Permissions
How to Share Your Calendar with Colleagues, Friends, and Family:
- Sharing a Calendar:
- On the left-hand side, click the three dots next to the calendar you want to share.
- Select “Settings and sharing.”
- Under “Share with specific people,” add the email addresses of those you want to share with.
- Choose the level of access (e.g., “See only free/busy,” “See all event details,” “Make changes to events”).
- Public Sharing:
- In the same settings menu, under “Access permissions,” check the box “Make available to public” if you want anyone with the link to view your calendar.
- Choose between “See all event details” or “See only free/busy” to control how much information is visible.
Managing Permissions and Privacy Settings:
- Setting Permission Levels:
- See Only Free/Busy (Hide Details): Ideal for privacy while indicating availability.
- See All Event Details: Share full event details without allowing changes.
- Make Changes to Events: Allow others to edit events but not manage sharing settings.
- Make Changes and Manage Sharing: Grant full access, including the ability to share the calendar further.
- Privacy Settings for Events:
- When creating or editing an event, you can mark it as “Private” to restrict visibility to only those with explicit access, even if the calendar is shared.
- Revoking Access:
- Go to the “Settings and sharing” of the relevant calendar.
- Under “Share with specific people,” click the trash icon next to the person’s email to revoke their access.
By using the “Find a Time” feature and setting up recurring meetings efficiently, you can streamline the process of scheduling meetings with multiple people. Additionally, sharing your calendar and managing permissions carefully will ensure that you maintain the right balance between collaboration and privacy.
Productivity Hacks
5.1 Time Blocking
Explanation of Time Blocking and How to Implement It Using Google Calendar:
- What is Time Blocking?
- Time blocking is a time management method where you allocate specific blocks of time for different tasks or activities throughout your day. This technique helps in focusing on one task at a time, reducing multitasking, and improving efficiency.
- Implementing Time Blocking in Google Calendar:
- Identify Key Tasks: List out the tasks you need to accomplish for the day or week.
- Create Time Blocks: Open Google Calendar and create events for each task, assigning specific start and end times. Be realistic about how long each task will take.
- Color Coding: Use different colors for different types of tasks (e.g., blue for meetings, green for focused work, yellow for breaks).
- Include Breaks: Schedule short breaks between time blocks to rest and recharge.
- Review and Adjust: At the end of the day or week, review your time blocks and adjust them based on what worked and what didn’t.
Benefits of Time Blocking for Productivity:
- Enhanced Focus: By dedicating specific time slots to particular tasks, you minimize distractions and enhance your focus.
- Better Time Management: It helps in effectively managing your time and ensures that all important tasks get the attention they need.
- Reduced Overwhelm: Breaking your day into manageable chunks can make large projects feel less overwhelming.
- Improved Work-Life Balance: By scheduling both work tasks and personal activities, you can maintain a better balance between professional and personal life.
5.2 Integrating with Other Google Apps
How to Use Google Calendar Alongside Google Keep, Gmail, and Google Drive:
- Google Keep:
- Creating Tasks: Create notes and to-do lists in Google Keep and set reminders that sync with Google Calendar.
- Access from Calendar: Open the Google Keep sidebar in Google Calendar to view and manage your notes and reminders alongside your events.
- Gmail:
- Email to Event: Turn emails into calendar events directly from Gmail. Open an email, click on the “More” menu (three dots), and select “Create event.”
- RSVP from Gmail: Respond to event invitations directly from Gmail without needing to open Google Calendar.
- Google Drive:
- Attach Files to Events: When creating or editing an event, click on the paperclip icon to attach files from Google Drive. This is useful for meetings or tasks that require specific documents.
- Shared Drives: Use shared drives to collaborate on documents, and link relevant files to calendar events for easy access.
Creating a Seamless Workflow with Google’s Ecosystem:
- Unified Interface: Access Google Keep, Tasks, and other apps directly from the Google Calendar sidebar for a seamless workflow.
- Smart Suggestions: Use Gmail’s smart suggestions to add events to your calendar based on email content, such as flight confirmations or appointment reminders.
- Integrated Reminders: Set reminders in Google Keep or Google Tasks that appear in Google Calendar, ensuring all tasks and notes are centralized.
5.3 Automating Repetitive Tasks
Using Tools Like Zapier to Automate Calendar Tasks:
- Introduction to Zapier:
- Zapier is a web automation tool that connects different apps and services, allowing you to create workflows (called “Zaps”) that automate repetitive tasks.
- Setting Up Automations with Zapier:
- Create a Zapier Account: Sign up at zapier.com.
- Choose Trigger and Action: Select Google Calendar as your trigger app and define the trigger event (e.g., new event created). Choose an action app (e.g., Slack, Trello) and define the resulting action (e.g., post a message in Slack).
Examples of Automation to Save Time and Increase Efficiency:
- Event Notifications:
- Automatically post new Google Calendar events to a Slack channel to keep your team informed.
- Task Management:
- When a new event is created in Google Calendar, automatically create a task in Trello or Asana.
- Meeting Follow-ups:
- After a meeting ends, automatically send follow-up emails or create follow-up tasks in your task management app.
- Calendar Updates:
- Sync events between Google Calendar and other calendar services like Outlook or Apple Calendar to ensure all your schedules are aligned.
By implementing time blocking, integrating with other Google apps, and automating repetitive tasks, you can significantly enhance your productivity and streamline your workflow using Google Calendar.
Conclusion
Recap of Key Points
In this article, we explored a variety of features and hacks to help you boost your productivity using Google Calendar:
- Event Creation and Management: We discussed quick event creation, editing, and the use of color-coding to differentiate between types of events.
- Task Integration: We covered how to integrate Google Tasks with your calendar to consolidate tasks and events in one place.
- Setting Reminders and Notifications: We highlighted customizing reminders and best practices for notification settings to stay on top of your schedule without feeling overwhelmed.
- Scheduling Meetings with Ease: We introduced the “Find a Time” feature for coordinating with multiple people and managing recurring meetings efficiently.
- Sharing and Permissions: We provided steps on how to share your calendar and manage permissions to collaborate effectively while maintaining privacy.
- Time Blocking: We explained the time blocking method and its benefits for productivity, along with steps to implement it using Google Calendar.
- Integrating with Other Google Apps: We showed how to use Google Calendar alongside Google Keep, Gmail, and Google Drive to create a seamless workflow.
- Automating Repetitive Tasks: We discussed using tools like Zapier to automate repetitive calendar tasks, saving time and increasing efficiency.
Encouragement to Implement Tips
Implementing these tips and features can transform the way you manage your time, making your daily routine more organized and productive. Start small by trying out one or two features, such as color-coding events or integrating Google Tasks, and gradually incorporate more advanced techniques like time blocking and automation.
Call to Action
We’d love to hear about your experiences with Google Calendar! Share your own tips and hacks in the comments section below. How do you use Google Calendar to stay productive? Your insights could help others make the most of this powerful tool. Let’s build a productive community together!
See Also
-

Microsoft Edge vs Chrome vs Firefox in 2025: Which Browser Is Truly Winning the Internet?
-

WhatsApp 2025 Ultimate User Manual: Hidden Features, Tips & Tricks Revealed
-

Voice Typing Made Easy: Expert Tips & Tricks for Perfect Hands-Free Writing
-

Top 7 Best Password Managers You Need to Protect Your Online Identity
-
Master Your Writing: The Top Online Language and Grammar Tools You Need
-

Unlock the Power of Google Lens: Discover Hidden Features You Never Knew Existed