Domain Based Network Deployment In Azure: Step by Step Deployment Procedures. Earn computer networking hands on experience in cloud.
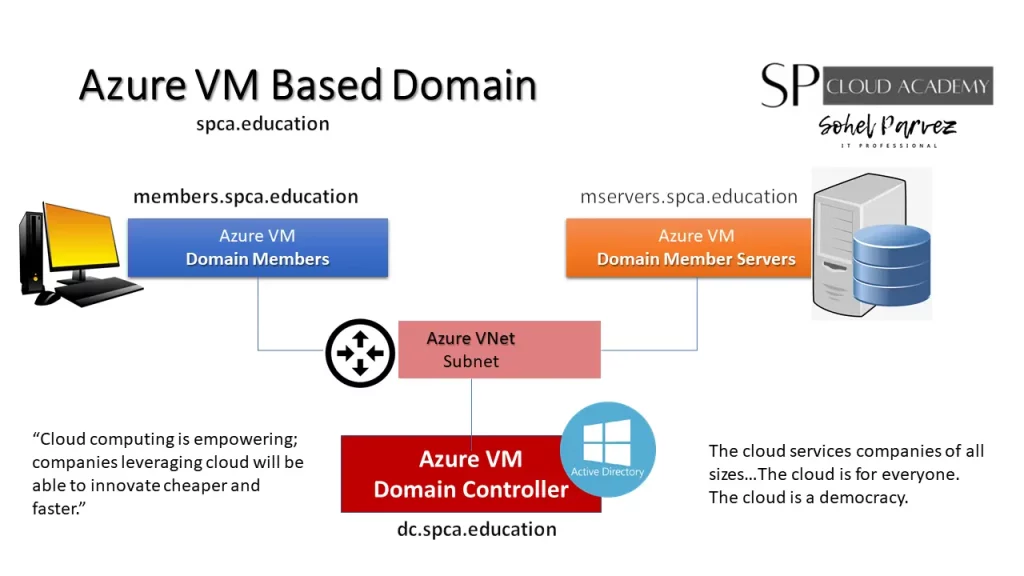
Domain Based Network a system of centralized network administration, in which the permissions that grant access to resources in the network are maintained in one or more servers called “domain controllers”. Domain-based networks use a hierarchical structure that enables assigning permissions to users who collaborate with different departments in an organization. Microsoft’s Active Directory is based on the domain system.
Domain Based Network features:
- Client-Server in nature
- Clients and server are differentiated
- All network PCs centrally connected which called domain
- Authorization needed to join a domain
- Network managed by domain controller (DC)
- Central IAM and access control by Active Directory services
In this article focused on:
- Domain based network model
- Step by step procedures:
- Create a VM with Windows Server 2019/2022 Data Center
- Configure VM Networking and Static IP Addresses
- Install Active Directory Domain Services
- Promote and Configure the VM as a Domain Controller (DC)
- Member Servers Setup
- Workstation setup and joining in Domain
- Log in as a domain user
Domain Based Network Deployment In Azure: Required Resources
- Azure Subscriptions
- Azure VMs
- Azure VNET and Subnet
Pre Deployment Works
- Needs Analysis
- Plan for Deployment
- Design a Network Diagram
- Create Resourse Group
- Create a VNET and Subnet in created resourse group
- Create all VMs in same subnet (for minimize routing and switching)
Domain Based Network Deployment In Azure: Deployment Model
Step by Step Deployment Procedures
Server and Domain Setup
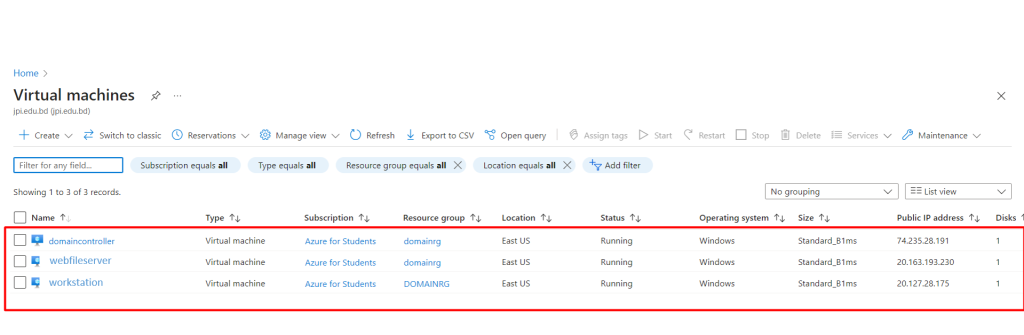
- Create a VM with Windows Server 2019/2022 Data Center
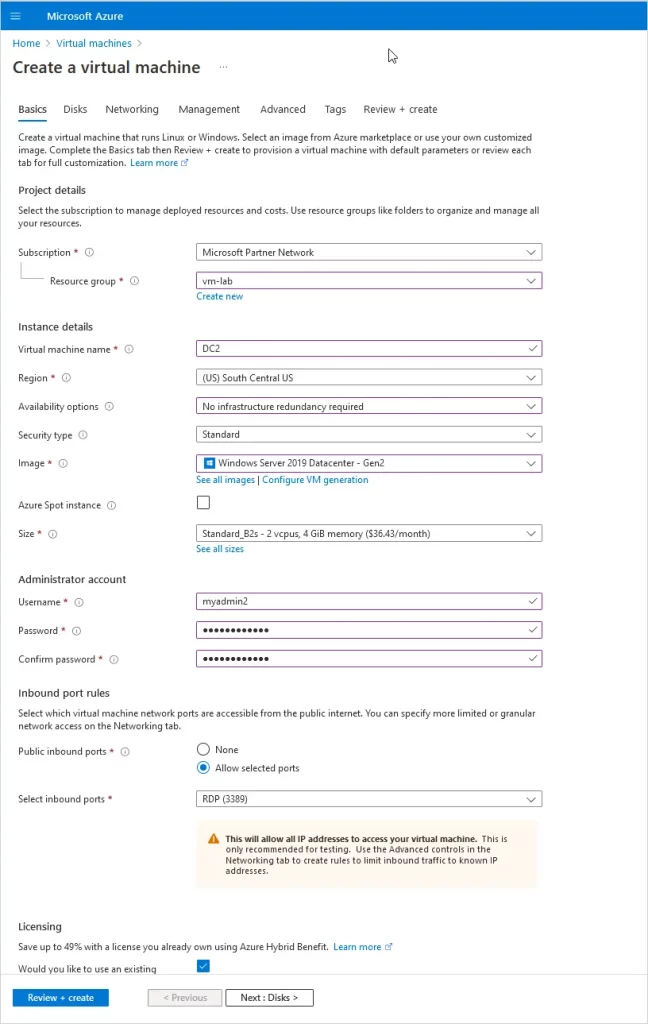
- Sign in to your azure portal, https://portal.azure.com
- Click on “Virtual machines”
- Click on Create and select “Azure virtual machine”
- Enter basic information for the new VM
- Now click Next to go to the Disks page
- Enter disk details for the VM
- Enter nessesary info in netwoworking, management, advanced, tags tab
- Clicck on Review+create button
- After validation process complete on create
- Subscription: Select the subscription you want to use for the VM.
- Resource group: Select an existing or create a new resource group.
- Virtual machine name: Give your VM a name.
- Region: Choose your region, you typically want a region that is close to you.
- Availability options: This is for redundancy and will ensure your VMs are still running if one Azure data center has a failure. You want this for production VMs. I’m just creating a test VM so I’ll choose “No infrastructure redundancy required.”
- Security Type: I’ll choose Standard.
- Image: Pick the OS you want to use, I’ll pick “Windows Server 2019 Datacenter”.
- Size: You will need to determine the size of VM you need. For testing reasons, I’ll choose a small VM to keep costs low.
- Username and password: This will be the administrator account for the VM.
- Public inbound ports: For production, you want this set to “none”. For testing, I’ll leave RDP open.
- Licensing: If you have an existing license you can use select the box, this can save money on each VM.
- Configure VM Networking and Static IP Addresses
- Domain controllers need a static IP address and the DNS pointing to itself. For on-premises DCs you would just go into the NIC settings and manually configure the IP settings. With Azure VMs it’s recommended to set this at the Virtual Network Interface.
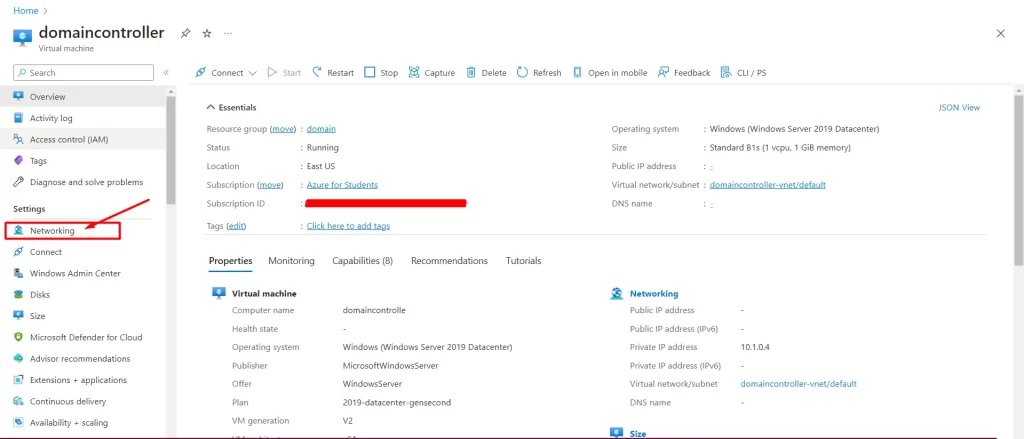
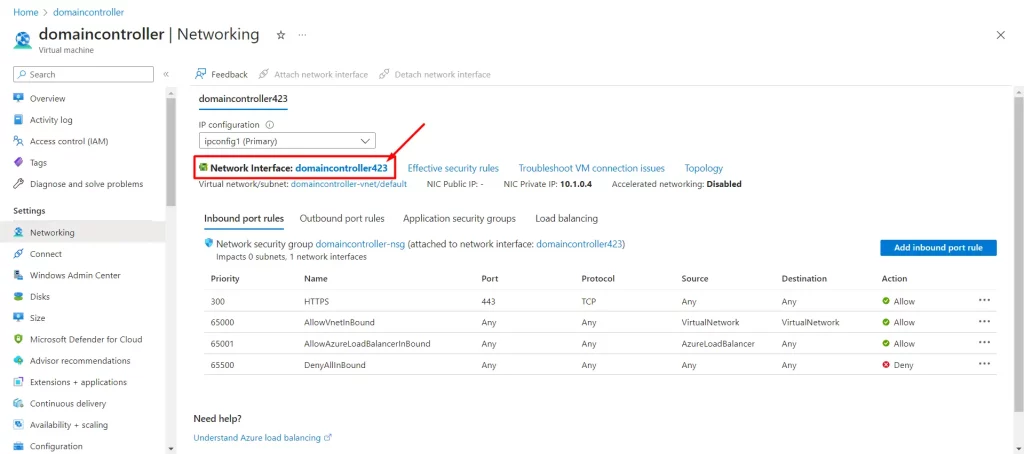
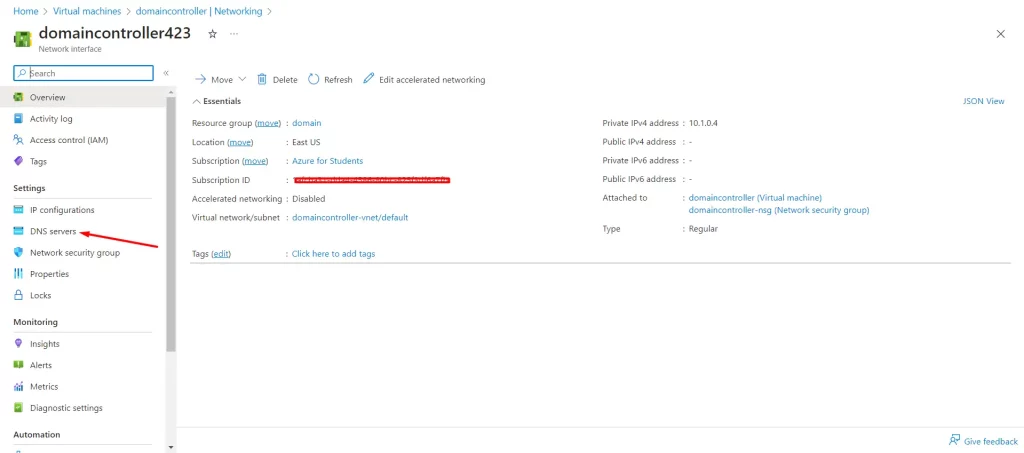
- Go to VM Networking settings
- In the right-hand menu for your VM under settings click on “Networking”
- Now click on the Network Interface for the VM (You will have a different name)
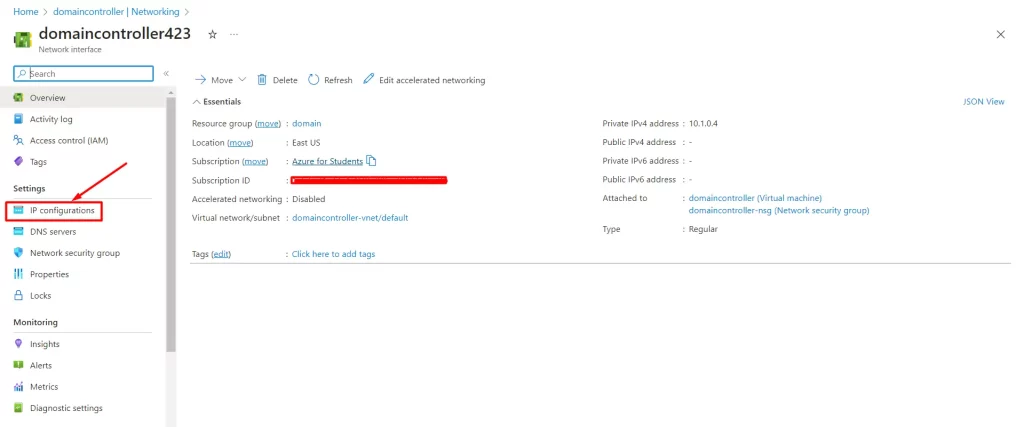
- Next click on “IP Configurations” in the left menu under settings
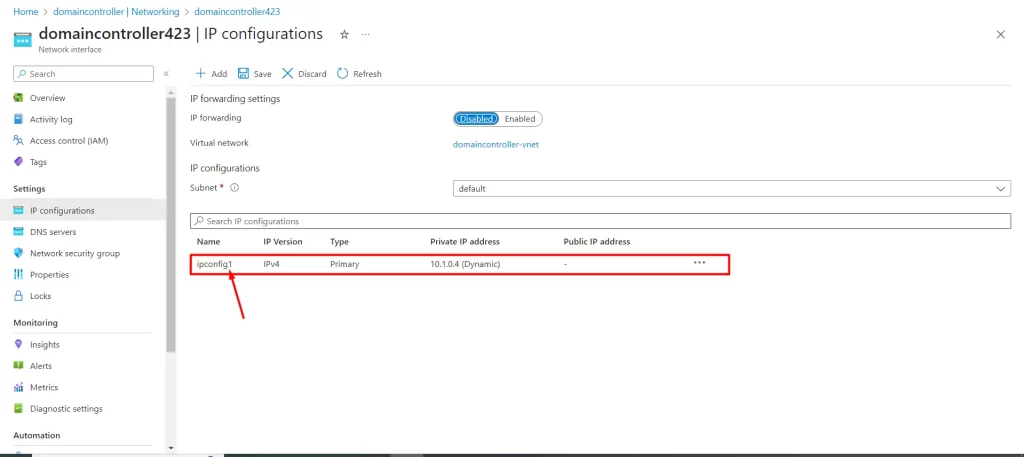
- Next click on “ipconfig1” under IP configurations
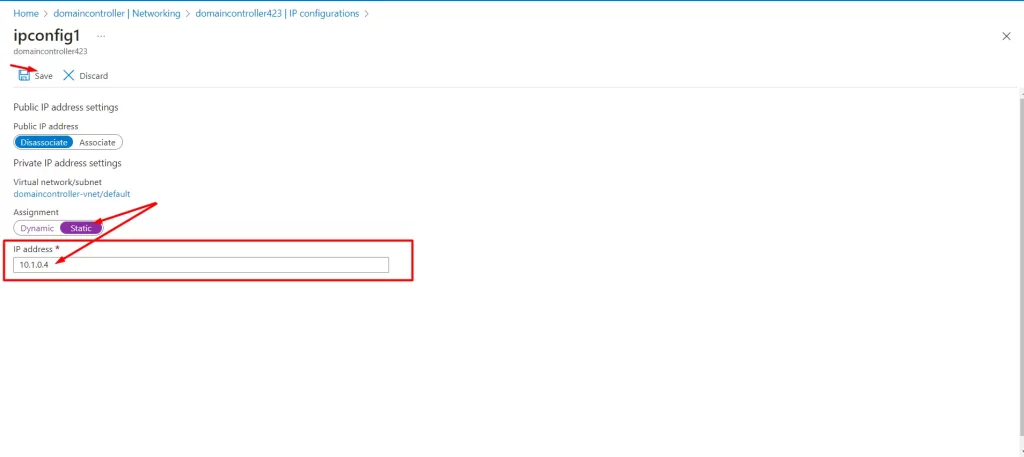
- Change the IP from “Dynamic” to “Static” and enter the IP address you want the domain controller to have, it must be an IP from the subnet you assigned to your virtual network
- Click “Save”. The network interface will be restarted to set the IP address
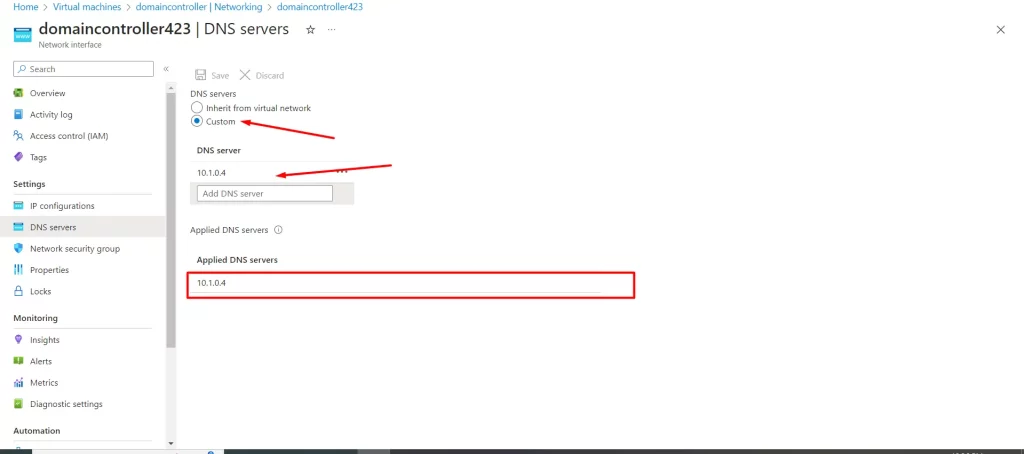
- Go back to the Network Interface and click on “DNS servers”
- Set the DNS server to the IP address of the domain controller

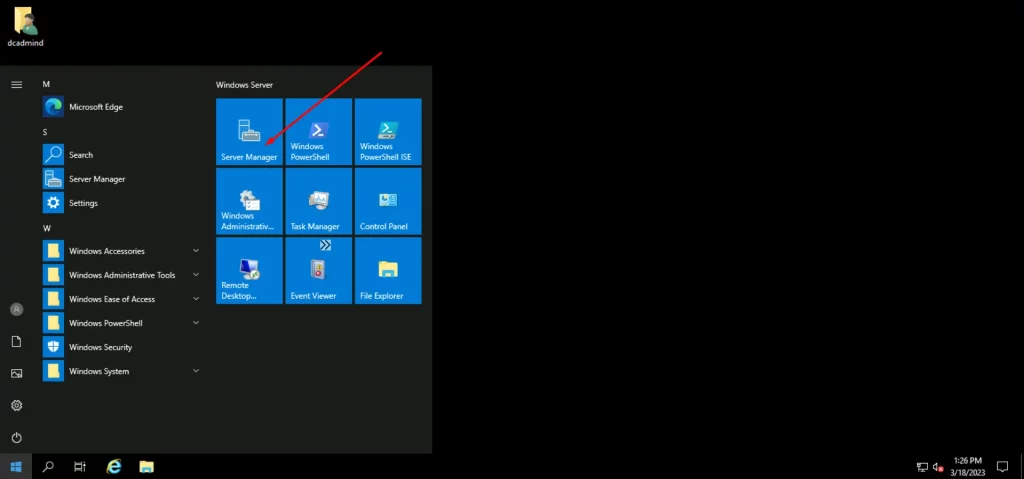
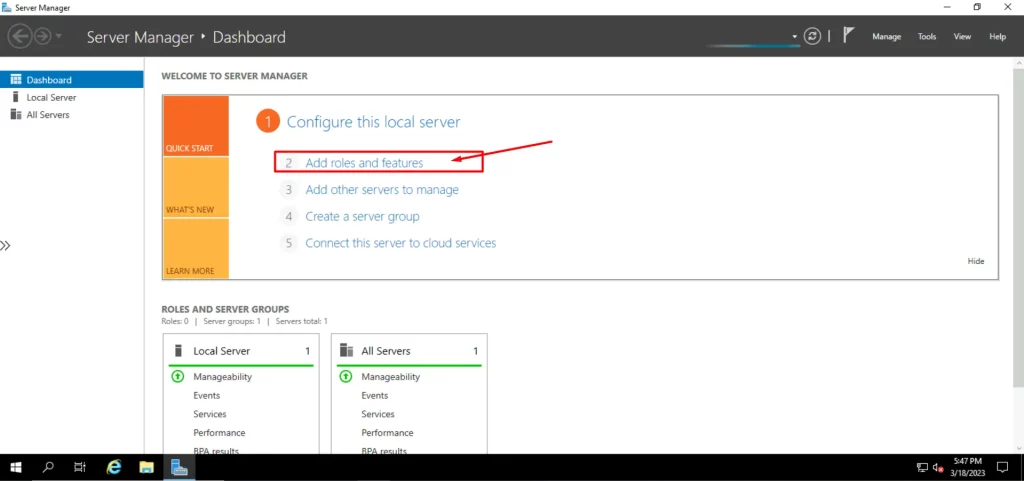
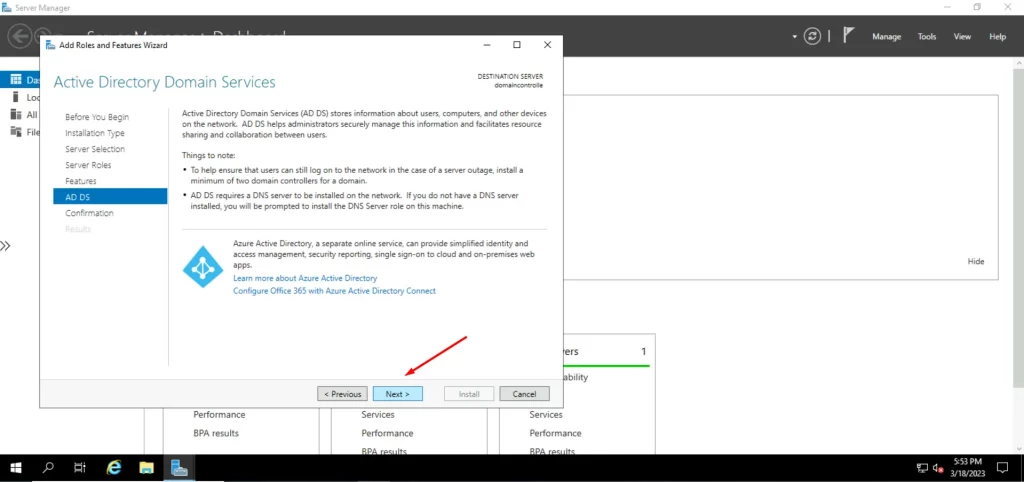
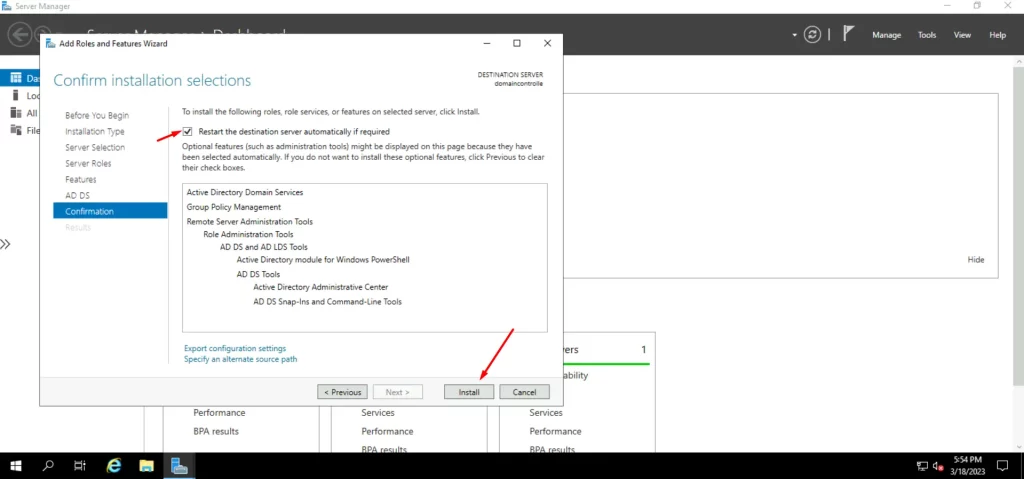
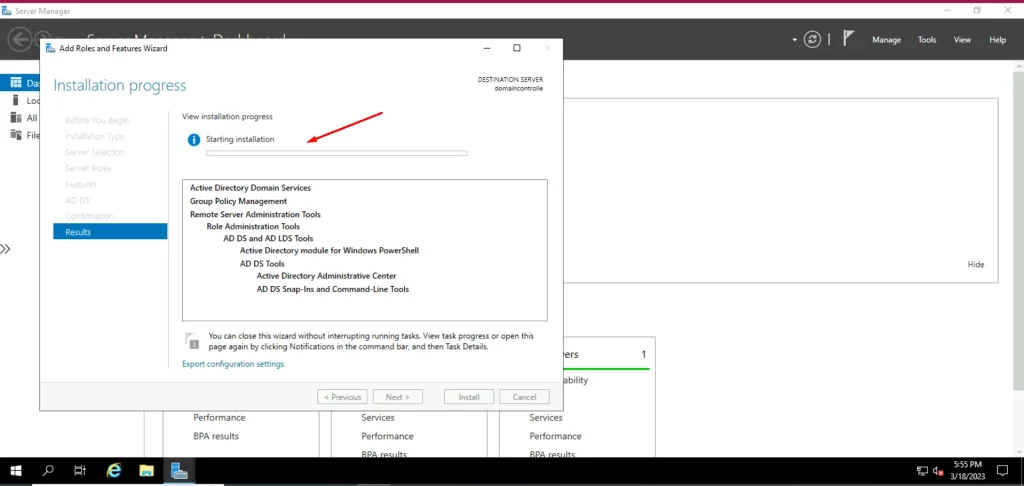
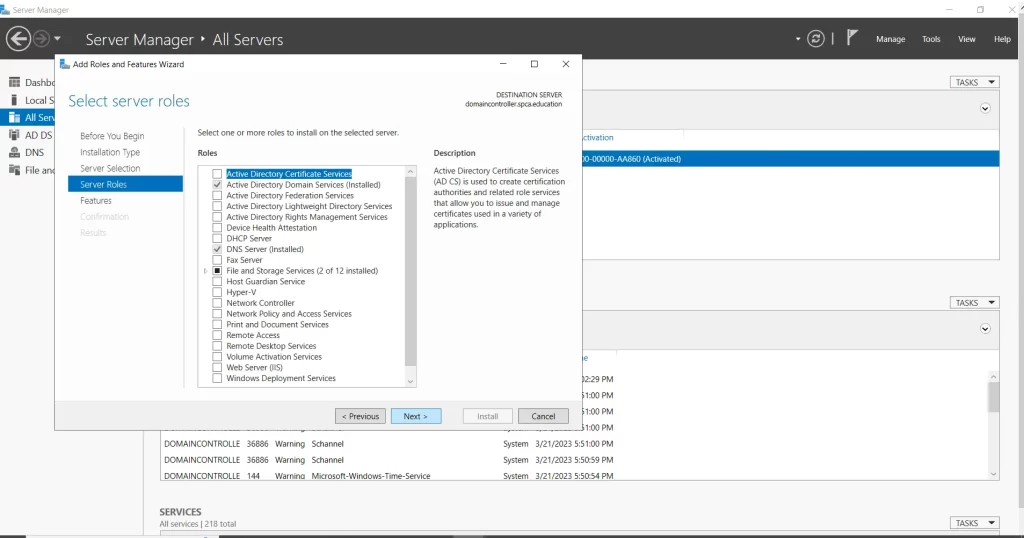
- Install Active Directory Domain Services
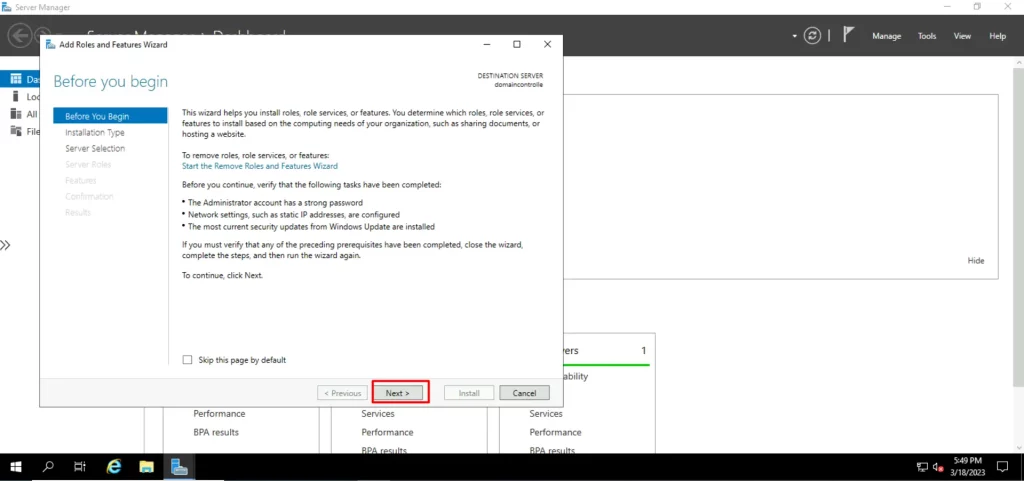
- Go to the server manager and click on “Add roles and features”
- Before you begin – click “Next”.
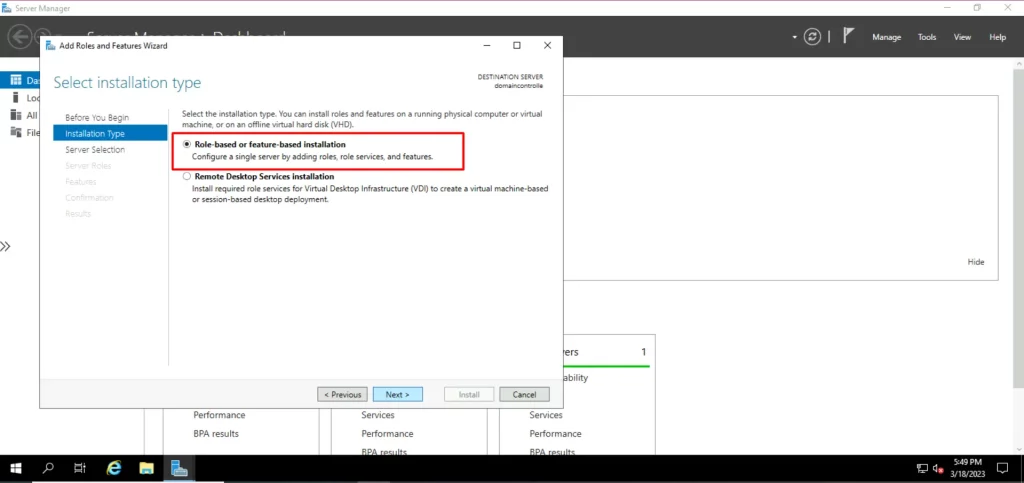
- Installation type – select “role based” and click “Next”.
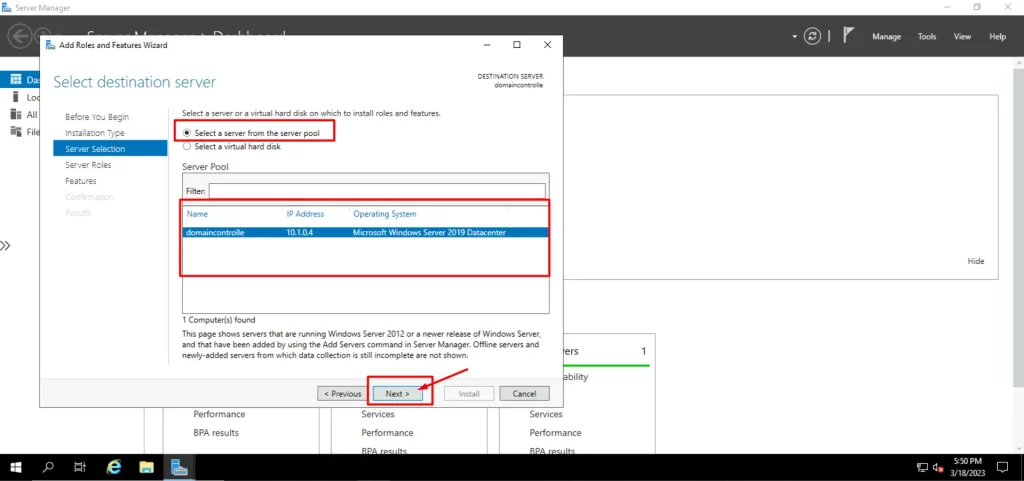
- Server Selection – select the hostname of your server and click “Next”.
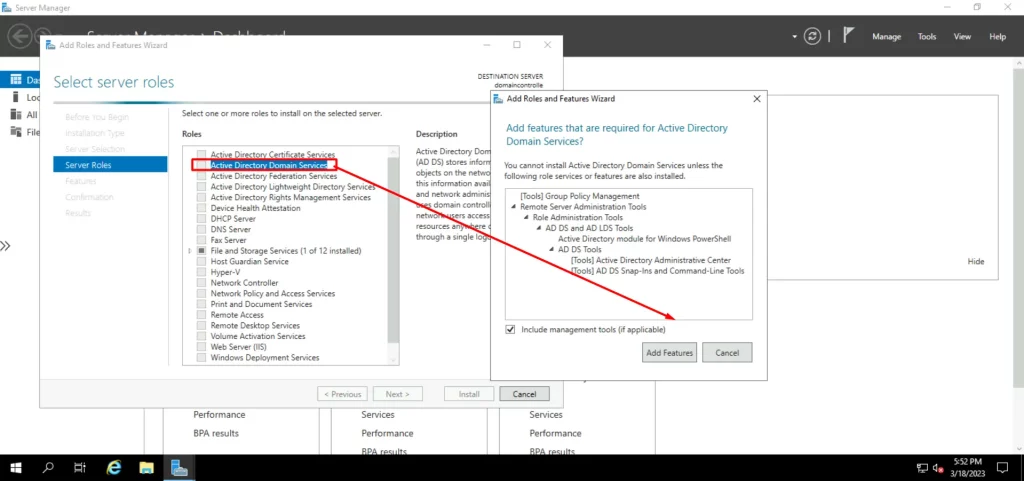
- Server Roles – select “Active Directory Domain Services”.
- Features – no features need to be added so click “Next”.
- AD DS – Click “Next”.
- Confirmation – Click “Install”.
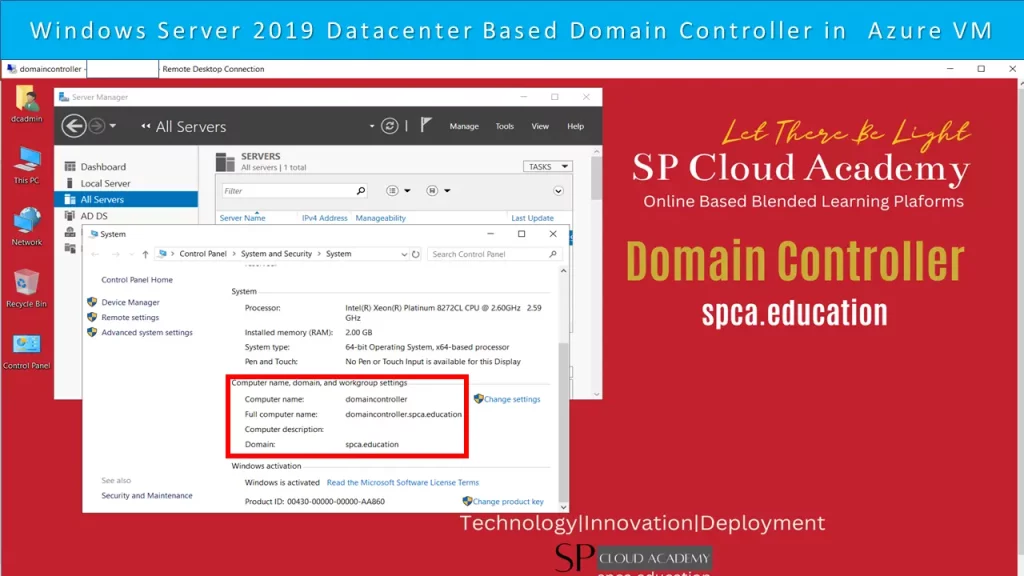
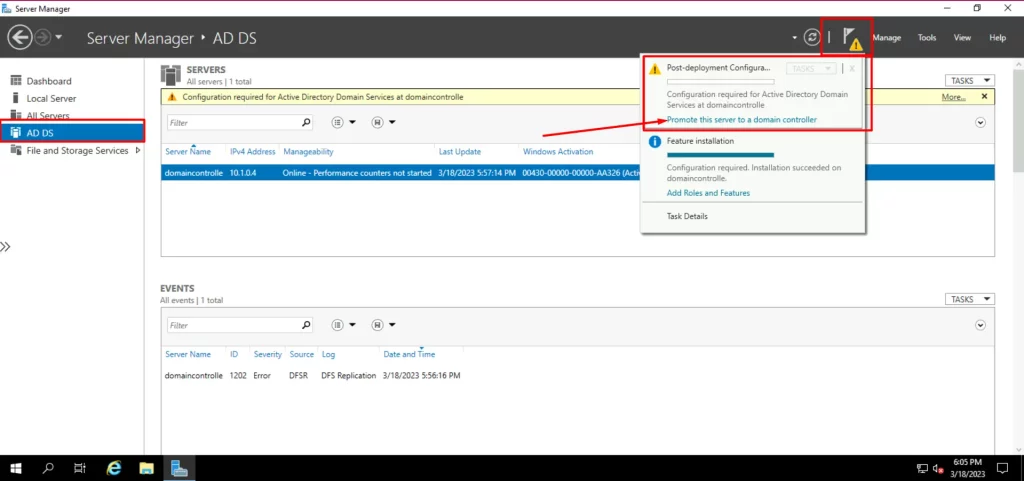
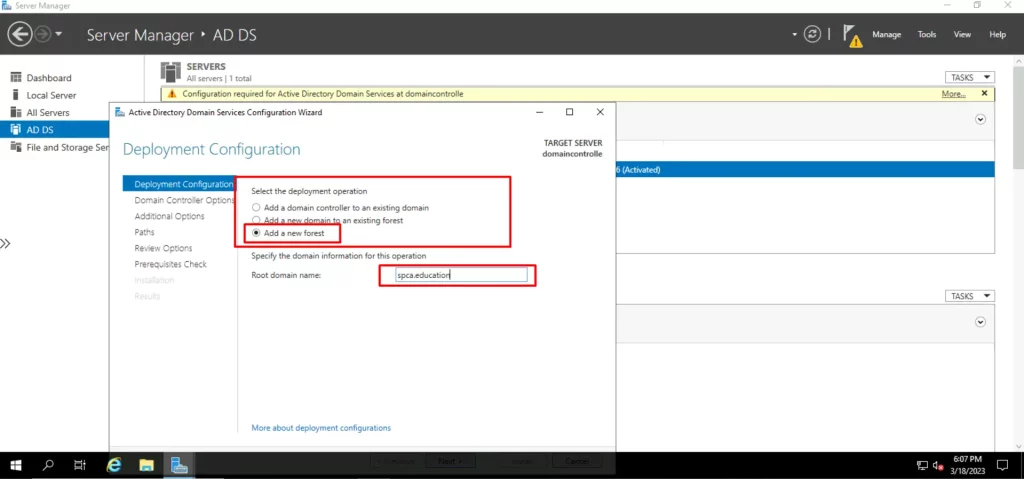
- Promote and Configure the VM as a Domain Controller (DC)
- After AD-DS installation completed click the yellow icon in the upper right corner and click on “Promote this server to a domain controller”
- Select “Add a new forest” and input your root domain name like spca.education
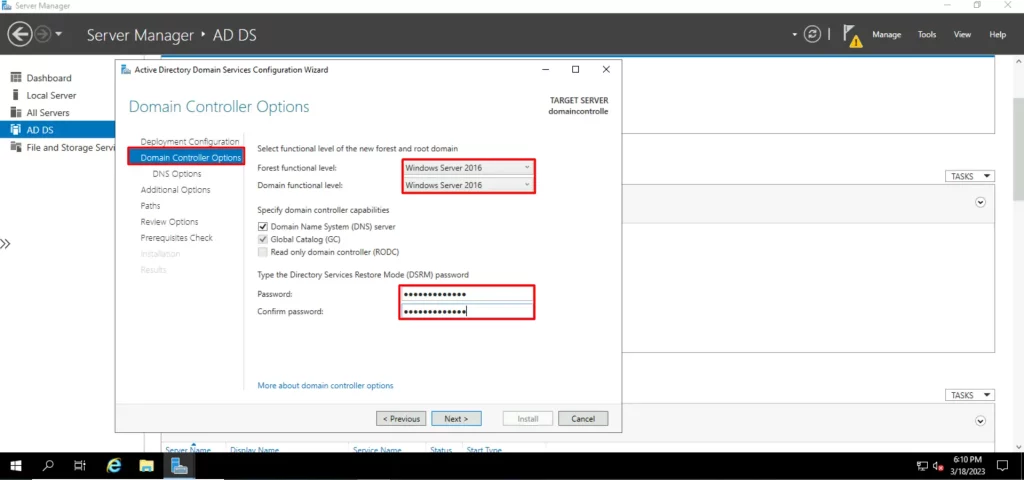
- Add a DSRM password and click next
- Additional Options: NetBIOS name and click “Next”
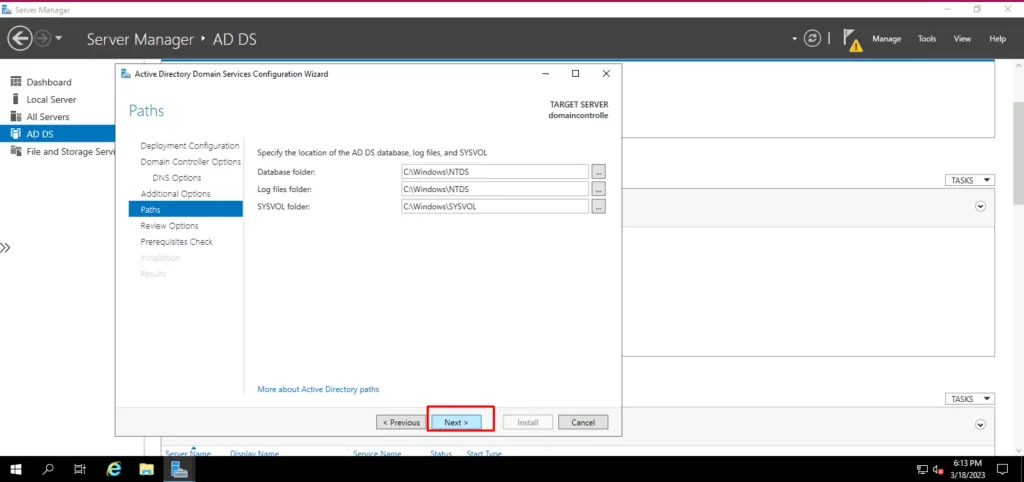
- Paths: Leave these as default settings
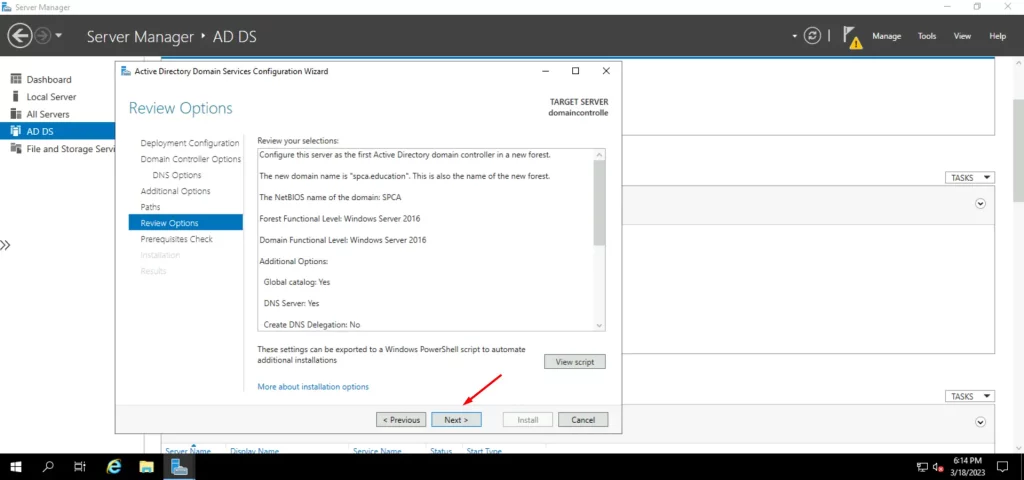
- Review Options: Review your settings and click “Next”
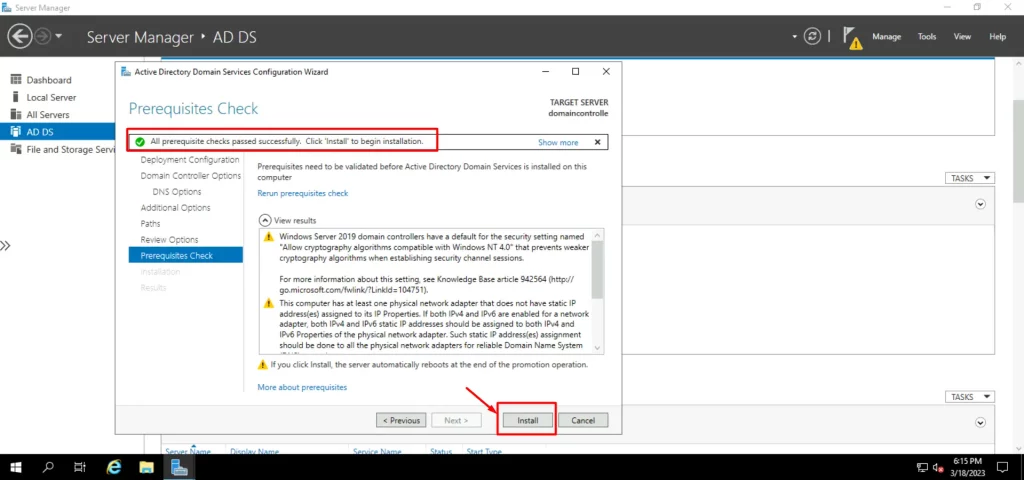
- Prerequisites Check: If the Prerequisites pass click on “Install”
When done installing the server will reboot and will now be a domain controller.
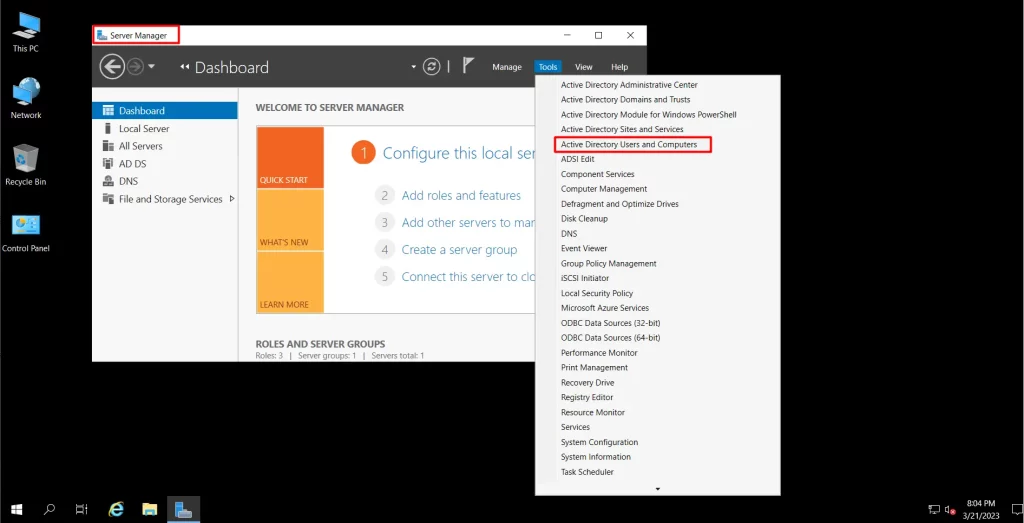
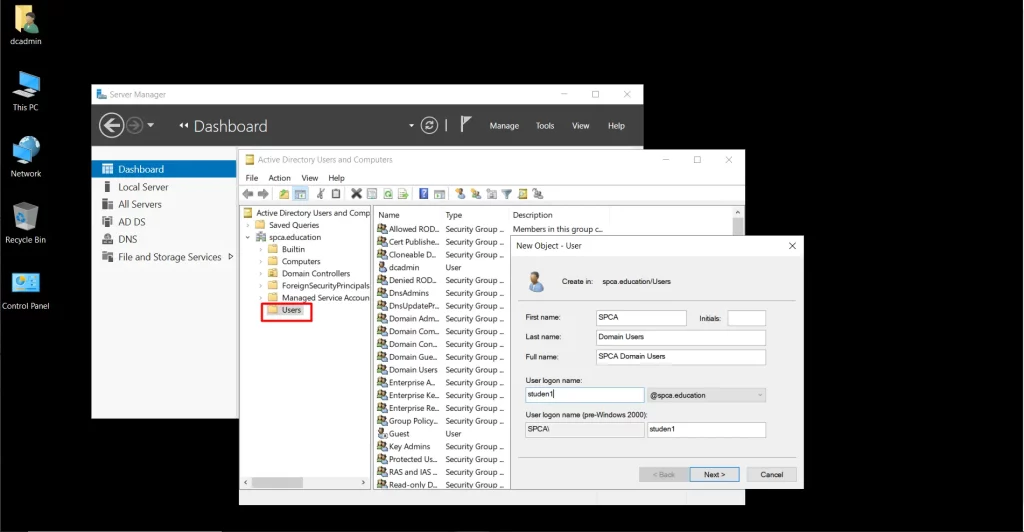
- Create Domain Users, Group and OUs
- Create necessary Domain Users, Group and OUs
- Assign user rights
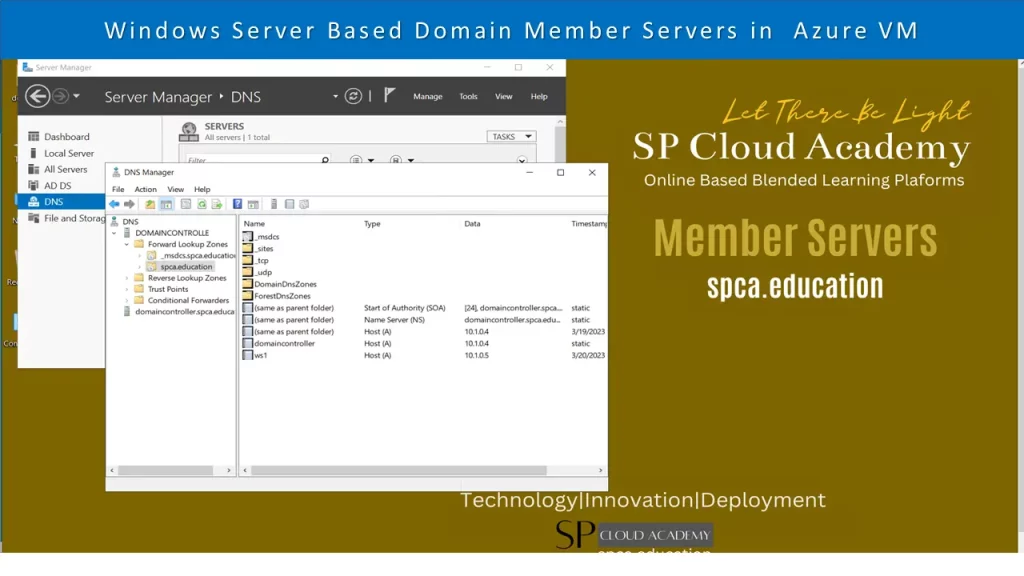
Member Servers Setup
- Create necessary VMs with server OS
- Join the Domain
- Install and configure the necessary servers
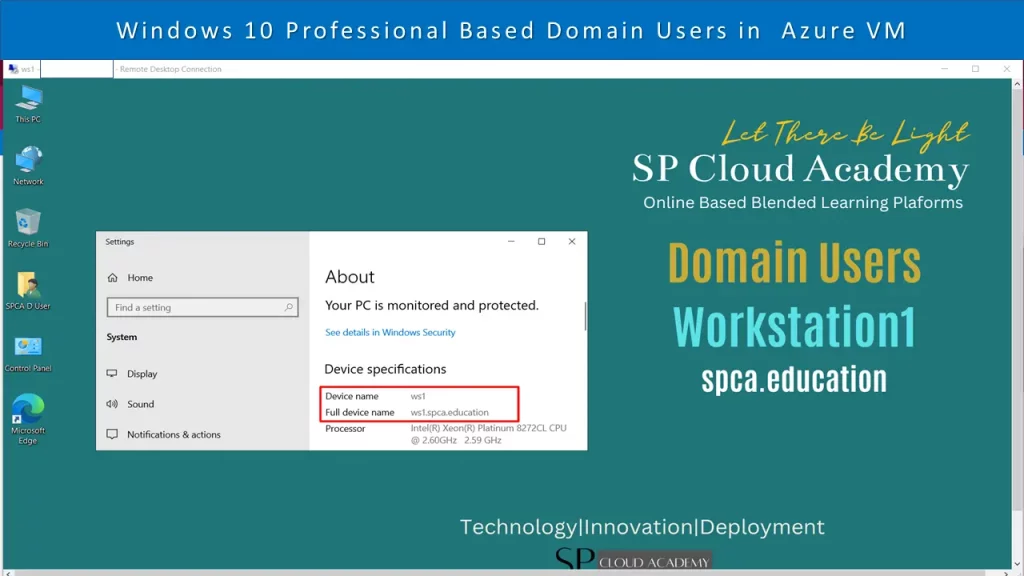
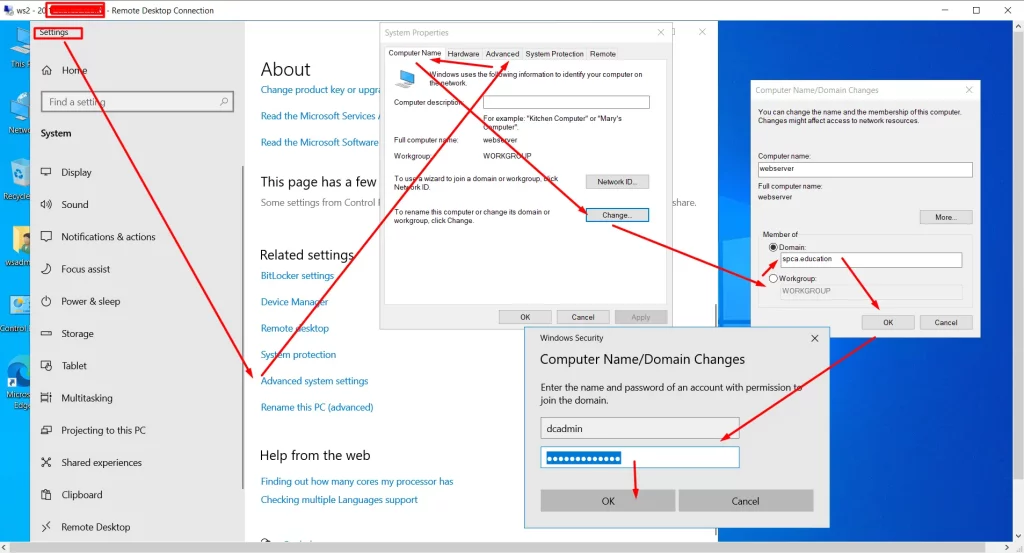
Workstation setup and joining in Domain
- Create a VM with Windows Desktop/ Server OS
- Create a workstation VM
- Add DNS Server in networking settings
- Join in the domain
- Log in workstation VM
- Go to settings
- Click on Advanced System settings
- Click on Computer Name tab
- Click on Change button
- Select Domain radio button and click on OK button
- Enter administrative domain user name and password
- Then click Ok
After initializing PC will be restart and become a domain member
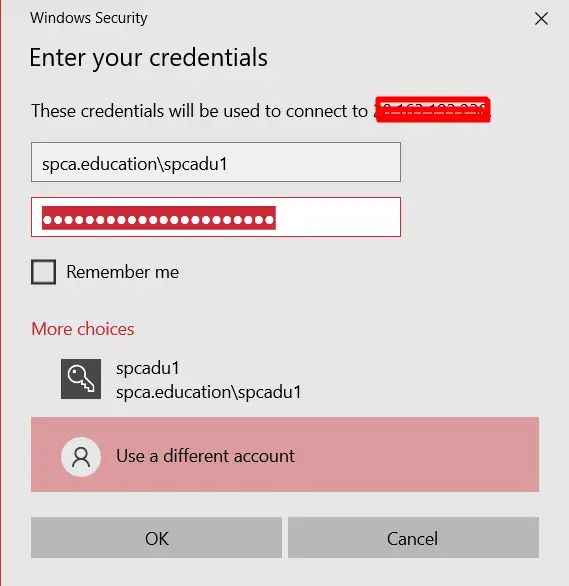
- Log in as a domain user
- Start your workstation VM
- Open RDD
- Enter User name and Password
Author
Cloud Computing and Azure Related Posts
-

Battle of the Giants: Comparing AWS, Google Cloud, and Microsoft Azure Head-to-Head
-

Cloud 2025: Game-Changing Innovations Driving the Future of Technology
-

The Ultimate Cloud Hosting Handbook: Every Feature, Benefit, and Pitfall Explained
-

From Hardware to Apps: Mastering Every Type of Virtualization in Cloud Computing
-

Unlock the Sky: 10 Must-Read Books on Cloud Computing for Every Skill Level
-

Your Cloud Migration Just Got Easier: A Step-by-Step Decision Guide